Drywall Installation: Complete Step-by-Step Guide
Master the art of drywall installation with our professional guide. From hanging panels to achieving a perfectly smooth finish — learn everything you need to transform your space.
START YOUR PROJECTWhy Drywall Matters: Drywall is the canvas of your home. Proper installation ensures smooth walls, reduces sound transmission, and provides a durable surface for paint or wallpaper. Whether you're finishing a basement, renovating a room, or building a new home, understanding the process saves time and money while delivering professional results.
Quick Navigation
Step 1: Prepare the Area
Before you start hanging drywall, proper preparation is essential for a smooth installation. Begin by removing all furniture, and covering floors with drop cloths or plastic sheeting to protect against dust and debris. Inspect the studs and ensure they are properly spaced at 16 inches on center, which is the standard for most residential construction. If you're working in an older home, check that the framing is level and true — any unevenness will affect the drywall installation. Also, take this opportunity to run any electrical wiring or plumbing that will be hidden behind the walls. For more comprehensive home renovation planning, consider exploring our home renovation 101 guide for foundational advice.
Make sure you have the right tools ready: a drywall lift (for ceilings), utility knife, T-square, and drywall screws. It's also wise to check local building codes and obtain any necessary permits before beginning a major project. If you're unsure about regulations, our home renovation permit guide can help clarify what's required.
Step 2: Hang Drywall Panels
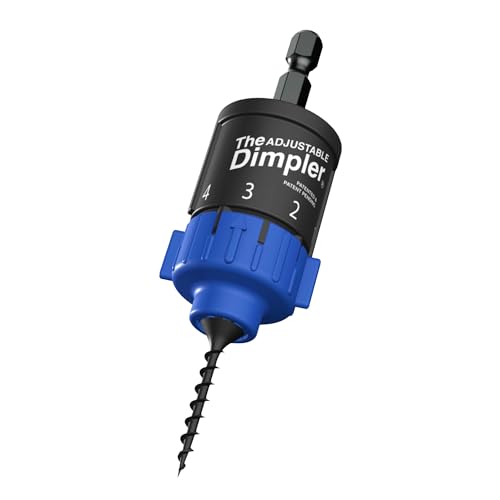
Hanging drywall is a straightforward process but requires precision. Start by measuring and cutting panels to fit your walls and ceilings. Use a utility knife to score the paper face, then snap the board along the cut line. Install panels horizontally to reduce the number of seams, or vertically if you prefer. Secure each panel to the studs using drywall screws spaced 12 inches apart on edges and 16 inches in the field. For ceilings, a drywall lift is invaluable — it allows you to hold panels in place while you screw them into the joists. When installing screws, ensure they are countersunk slightly below the paper surface, but not so deep that they tear the paper, as this compromises strength and finish quality.
If you're working on a basement remodeling project, be mindful of moisture. Use moisture-resistant drywall (green board) for areas prone to humidity. For kitchens and bathrooms, consider using cement board or water-resistant drywall as a base for tile installations. Learn more about these options in our kitchen remodeling and bathroom remodeling guides.
Step 3: Taping & Mudding Joints
This is where your drywall begins to look like a real wall. Apply joint compound (mud) over all seams and screw indentations using a 6-inch taping knife. Press paper or fiberglass tape into the compound, then smooth it with the knife to eliminate air bubbles. Allow the first coat to dry completely, typically 24 hours, before applying a second coat. For inside corners, use a corner trowel to create a crisp, even finish. Outside corners require metal or plastic corner beads, which are attached before taping.
For the best results, apply at least three coats of compound, widening each application to blend the seam into the wall. Sand lightly between coats with a sanding sponge or pole sander to keep the surface smooth. If you're planning a whole-house renovation, investing in a high-quality mud pan and taping tools will make the job significantly easier and more professional. Also, consider using automatic tools like a mud banjo for large projects to speed up the process.
Step 4: Finishing and Priming
After the final coat of joint compound has dried and been sanded smooth, thoroughly clean the walls to remove all dust. Use a damp cloth or vacuum with a brush attachment to ensure a clean surface for paint. Apply a good-quality drywall primer — this seals the paper and compound, providing an even surface for paint. Priming also highlights any remaining imperfections that need a quick touch-up.
Once primed, you're ready for paint or wallpaper. Choosing the right finish can dramatically affect the look of your room. For high-traffic areas like hallways or living rooms, a matte or eggshell finish is durable and hides imperfections well. For more design inspiration, check our gallery wall ideas and interior design articles. Also, consider upgrading your energy-efficient windows as part of a larger renovation to improve comfort and reduce energy bills.
Essential Drywall Installation Tools
Having the right tools is critical for a successful drywall project. Below is a list of essential tools, their purpose, and approximate costs to help you budget.
| Tool | Purpose | Estimated Price |
|---|---|---|
| Drywall Lift | Holds ceiling panels in place during installation | $250–$500 |
| Utility Knife | Cutting drywall panels | $15–$30 |
| T-Square | Measuring and marking straight cuts | $25–$50 |
| Drywall Screw Gun | Driving screws quickly and to the correct depth | $80–$150 |
| 6-inch Taping Knife | Applying joint compound and tape | $10–$20 |
| 12-inch Taping Knife | Wide application for finishing coats | $15–$25 |
| Corner Trowel | Creating sharp, clean inside corners | $15–$30 |
| Sanding Sponge | Light sanding between coats | $10–$15 |
For a complete tool setup, consider investing in a high-quality tool kit. If you're looking to outfit your workshop, browse our tools & equipment section for reviews and recommendations. For precision work, tools like a calipers or dial indicator can be useful, though not essential for basic drywall.
Drywall Installation Cost Guide
Average Cost: $1,500–$3,500 for a typical 12x12 room (materials and professional installation). DIY Cost: $300–$600 for materials only, depending on room size and drywall type.
Note: Costs vary based on location, ceiling height, and the complexity of the project (e.g., multiple cutouts for windows/doors). For accurate estimates, use our cost calculator for home renovation projects. If you're planning a larger project like a home addition or a kitchen remodel, these tools can help you budget effectively.
Pro Tips for a Flawless Finish
- Use the right screws: Drywall screws are specifically designed for gypsum board. They have a bugle head and are self-tapping.
- Don't over-sand: Sanding too aggressively can tear the paper and create uneven surfaces.
- Apply thin coats: Multiple thin coats of joint compound are better than one thick coat — they dry faster and crack less.
- Keep your tools clean: Clean your taping knives between coats to prevent dried mud from damaging your work.
- Work from top to bottom: Finish ceilings before walls to avoid splattering compound on finished walls.
For more detailed guidance on home improvement, check out our home improvement category.
Frequently Asked Questions
Can I install drywall over existing drywall?
Yes, but it's generally not recommended. Adding layers increases weight and can compromise structural integrity. It's better to remove old drywall, especially if it's damaged or has moisture issues.
What type of drywall should I use for a bathroom?
Use green board (moisture-resistant) or cement board for bathrooms and other high-humidity areas. For more information, see our bathroom remodeling guide.
How long does it take to drywall a room?
For a DIYer, a 12x12 room can take 2-3 days to hang and finish, including drying time between coats. Professionals typically complete the same project in 1-2 days.