Gallery Wall Ideas: The Ultimate Guide to Designing & Hanging
Transform your blank walls into stunning focal points with our expert guide to creating the perfect gallery wall. From layout planning to hanging techniques, we've got you covered.
Creating a gallery wall is one of the most impactful and affordable ways to refresh your home decor. Whether you're showcasing family photos, art prints, or a mix of objects, a well-designed gallery wall tells your story and adds personality to any room. This comprehensive guide covers everything from planning your layout to choosing the right painting tools and hardware for a professional finish.
If you're also considering a larger project, our guides on home renovation 101 and finding contractors near you can help you plan your next steps. For now, let's dive into the art of the gallery wall.
1. Planning Your Gallery Wall
The key to a stunning gallery wall is thoughtful planning. Before you pick up a hammer, consider the following essential steps.
Choose Your Theme & Story
Your gallery wall should reflect your personality and the room's purpose. Are you creating a family history wall for the living room, a travel-inspired collection for the hallway, or a modern art statement for the home decor? A cohesive theme ensures your wall feels intentional, not cluttered. Mixing frame styles, colors, and art types can add visual interest, but maintain a unifying element like color palette or subject matter.
Select the Perfect Location
The best gallery walls are placed where they can be appreciated. Consider high-traffic areas like hallways, above the sofa, or as a focal point in a dining room. Ensure the wall is large enough to accommodate your collection and that the gallery wall will be visible from multiple angles. If you're working on a larger space, you might also explore living room renovation ideas to integrate your gallery wall seamlessly.
Gather & Curate Your Collection
Start by gathering all the pieces you want to include: framed photos, art prints, mirrors, textiles, or even small 3D objects. Lay them on the floor to visualize the arrangement. Play with different combinations and scale. A mix of large statement pieces and smaller accents creates a dynamic look. Remember to consider the frames – they are as important as the art itself.
2. Layout & Design Tips
There are several approaches to arranging your wall. Choose the style that best fits your space and collection.
Popular Layout Styles
- Grid Layout: A clean, symmetrical arrangement with equal spacing. Perfect for a modern, organized look.
- Salon Style: An eclectic, floor-to-ceiling arrangement that feels curated over time. Great for mixing art and objects.
- Asymmetrical: Balanced but not perfectly symmetrical. Ideal for a casual, contemporary feel.
- Staircase Gallery: Follows the angle of your staircase for a dynamic, flowing display.
Design Principles
- Balance: Distribute visual weight evenly by mixing large and small pieces.
- Focal Point: Have one or two hero pieces that anchor the arrangement.
- Spacing: Maintain consistent spacing (2-4 inches) between frames for a cohesive look.
- Height: The center of the gallery wall should be at eye level (around 57-60 inches from the floor).
3. Step-by-Step Hanging Guide
Once you've finalized your layout, it's time to bring your vision to life. Follow these steps for a flawless installation.
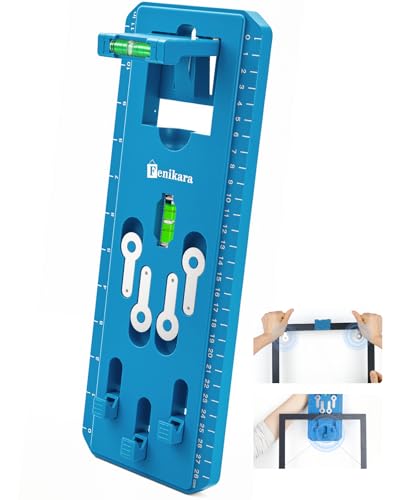
- Prepare Your Workspace: Lay out your pieces on the floor according to your chosen layout. Use a laser level or a long spirit level to ensure your arrangement is straight. For precise measurements, a tape measure is indispensable.
- Create a Template: Trace each frame onto paper (kraft paper works well) and cut out the shapes. Tape these paper templates to the wall using painter's tape. This allows you to adjust the layout without making unnecessary holes.
- Mark Your Holes: Once you're happy with the template placement, use a pencil to mark where the hanging hardware (nail or screw) will go. The pencils and marking tools you choose can make a big difference here. For larger pieces, consider using a laser level to ensure perfect alignment.
- Install Hardware: Hammer in picture hooks or drill pilot holes for screws. For heavy frames, use wall anchors. A reliable drill will make this task quick and easy. Always double-check that your hardware can support the weight of your frames.
- Hang Your Art: Carefully remove the paper templates one by one and hang each piece. Use a level to make small adjustments. A digital angle gauge can help you get perfectly straight frames.
- Step Back & Refine: Once everything is hung, step back and assess the overall look. Make any necessary adjustments to spacing or alignment. Enjoy your new masterpiece!
4. Essential Tools & Hardware
Having the right tools on hand makes the hanging process smooth and professional. Here are the essentials.
Measuring & Leveling
Driving & Fastening
Hanging Hardware
- Picture Hooks & Nails
- Wall Anchors
- D-Rings & Wire
- Adhesive Strips (for lightweight items)
Safety & Misc.
- Safety Glasses
- Work Gloves
- Flashlight
- Painter's Tape
5. Gallery Wall Inspiration
Need a spark of creativity? Here are some popular gallery wall themes to get you started.
Family Photo Gallery
Display black-and-white family portraits in matching frames for a timeless, elegant look. Mix in a few candid shots for a more personal feel.
Travel Memory Wall
Showcase maps, tickets, and photos from your adventures. Use a mix of frames and even a small shelf to display souvenirs.
Modern Minimalist
Choose large-scale abstract art or black-and-white photography. Use sleek, matching frames and maintain ample spacing for a clean, sophisticated look.
Eclectic Mix
Combine different art styles, frames, and objects (like a small mirror or a macramé piece). This works best in a salon-style arrangement.
Frequently Asked Questions
How do I choose the right frames for my gallery wall?
Mixing frame styles (wood, metal, ornate) adds personality, but try to maintain a consistent color palette or a unifying element like frame thickness. Black and white frames are timeless and versatile.
What's the best way to plan the layout?
The paper template method is highly recommended. Trace your frames, cut them out, and arrange them on the wall with painter's tape. This allows you to experiment without making holes.
How high should the center of my gallery wall be?
The general rule is eye level, which is about 57-60 inches from the floor. In a room with high ceilings, you might hang it slightly higher to balance the space.
What tools do I need to hang a gallery wall?
Essential tools include a tape measure, a laser level, a drill or hammer, a marking pencil, and appropriate hanging hardware. A stud finder can also be helpful for heavy pieces.