Pipe Repair: Fix Leaks & Broken Pipes Like a Pro
Master the art of pipe repair with our complete DIY guide. From minor leaks to major pipe breaks, learn how to diagnose, fix, and prevent plumbing issues in your home.
Explore Pipe Repair Tools →Why pipe repair matters: A single leaking pipe can waste thousands of gallons of water annually and cause significant structural damage to your home. Whether it's a copper pipe repair, PVC pipe repair, or fixing a leaky pipe joint, having the right knowledge and tools can save you hundreds of dollars in plumber fees. This comprehensive pipe repair guide covers everything from identifying pipe types to step-by-step repair techniques, so you can handle most common plumbing issues with confidence.
Understanding Your Home's Pipes
Copper Pipes
Durable and heat-resistant, copper pipes are common in older and modern homes. They're reliable but can develop pinhole leaks due to corrosion or water pressure issues. Copper pipe repair often involves soldering or using compression fittings.
- Lifespan: 50–70 years
- Common issues: Pinhole leaks, burst pipes from freezing
- Repair methods: Soldering, push-to-connect fittings, epoxy
PVC & CPVC Pipes
Lightweight, affordable, and easy to install, PVC pipes are standard for drains and cold-water supply. CPVC handles hot water. PVC pipe repair typically uses primer and solvent cement to bond new sections.
- Lifespan: 25–40 years (PVC), 50+ years (CPVC)
- Common issues: Cracks from physical damage, joint separation
- Repair methods: Solvent welding, repair couplings, epoxy
PEX Pipes
Flexible, freeze-resistant, and increasingly popular in new construction. PEX uses fewer fittings and is easier to install than rigid pipes. Repairs often involve crimp or clamp rings.
- Lifespan: 40–50 years
- Common issues: Kinks, rodent damage, fitting failures
- Repair methods: Crimp fittings, push-to-connect, repair sleeves
Galvanized Steel Pipes
Found in older homes, these pipes are heavy and prone to internal rust and corrosion. They often need replacement rather than repair due to reduced water flow and leak risks.
- Lifespan: 20–50 years
- Common issues: Rust, low water pressure, leaks at joints
- Repair methods: Section replacement, transition fittings to copper/PEX
Essential Tools for Pipe Repair
Must-Have Pipe Repair Tools:
- Pipe Wrenches – for gripping and turning pipes
- Plumbing Tools – complete kits for various repairs
- Screwdrivers – for removing fixtures and access panels
- Hammers – for light demolition and fitting
- Tape Measures – precise measurements for pipe cutting
- Laser Levels – for ensuring proper slope in drain lines
- Work Gloves – protect hands from sharp edges and chemicals
- Safety Glasses – eye protection during cutting and soldering
Pro Tip: Having the right tools and equipment on hand before starting a repair saves time and frustration. For electrical work near pipes, always use voltage testers to avoid shocks.
Step-by-Step Pipe Repair Guide
Step 1: Identify the Pipe Type & Problem
Before any pipe repair, determine what material your pipe is made of (copper, PVC, PEX, or galvanized steel). Check for the type of damage: pinhole leak, crack, joint leak, or burst section. This will dictate your repair approach. If you're unsure, consult a professional or refer to your home's plumbing blueprints.
Step 2: Shut Off the Water Supply
Locate the main shut-off valve or the local shut-off valve for the affected area. Turn off the water to prevent flooding. Open a nearby faucet to drain residual water from the pipes. This step is crucial for any leaky pipe repair or copper pipe repair project.
Step 3: Cut Out the Damaged Section
Using a pipe cutter or hacksaw, cut out the damaged section of pipe. Ensure your cuts are straight and clean. For PVC pipe repair, use a ratchet cutter or fine-toothed saw. For copper, use a tube cutter for a clean edge. Measure and mark the replacement section to ensure proper fit.
Step 4: Prepare the Pipe Ends
For copper pipes, use a deburring tool and emery cloth to clean and smooth the pipe ends. For PVC, use a primer and cleaner to prepare the surfaces for solvent welding. For PEX, ensure the ends are square and free of burrs. Proper preparation ensures a leak-free connection.
Step 5: Install the Repair Fitting
Choose the appropriate repair method for your pipe type:
- Copper: Solder a coupling or use push-to-connect (SharkBite) fittings.
- PVC/CPVC: Apply solvent cement and join with a coupling or repair union.
- PEX: Use crimp rings or push-to-connect fittings.
- Galvanized: Use threaded unions or transition fittings to copper/PEX.
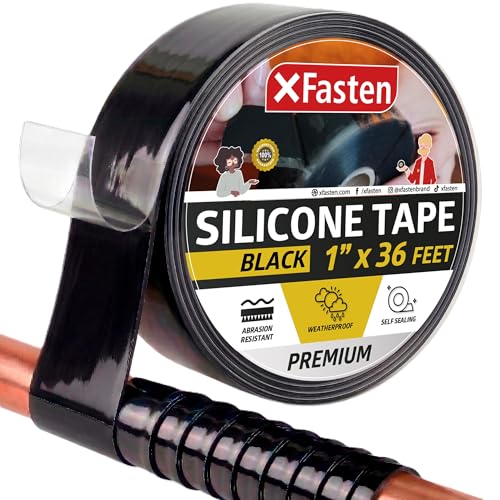
For temporary fixes, use epoxy putty or pipe repair tape, but plan for a permanent solution as soon as possible.
Step 6: Test the Repair
Slowly turn the water back on and check for leaks. Inspect the repaired area thoroughly, including joints and connections. If you notice any drips, tighten fittings or reapply sealant. Run water through the system to ensure proper flow and pressure.
Step 7: Final Cleanup & Prevention
Clean up any debris, and insulate pipes in cold areas to prevent future freezing. Consider installing water heater expansion tanks or pressure regulators to reduce stress on your plumbing system. Regular maintenance, like inspecting for signs of corrosion or moisture, can prevent future pipe repair emergencies.
⚠️ When to Call a Licensed Plumber: While many pipe repair tasks are DIY-friendly, some situations require professional expertise. Call a plumber if:
- You're dealing with main water line breaks or sewer line issues.
- The pipe is in a load-bearing wall or near electrical wiring.
- You need to replace large sections of galvanized or cast-iron pipes.
- You're not confident in your ability to solder copper pipes safely.
- The damage involves gas lines (call your utility company immediately).
For electrical repairs in wet areas, always consult a licensed electrician and review our electrical safety tips.
Common Pipe Repair Mistakes to Avoid
❌ Over-tightening Fittings
Over-tightening can crack plastic fittings or damage copper threads. Hand-tighten plus one-quarter to one-half turn is usually sufficient. Use pliers with care and avoid using excessive force.
❌ Using the Wrong Repair Material
Mixing pipe types incorrectly (e.g., copper to galvanized without dielectric unions) causes galvanic corrosion. Always use compatible materials or transition fittings designed for the purpose.
❌ Skipping Pipe Prep Work
Failing to clean, deburr, or prime pipes can lead to weak joints that leak. Always follow manufacturer guidelines for copper pipe repair and PVC pipe repair preparation.
❌ Ignoring Water Pressure
High water pressure (above 80 psi) stresses pipes and accelerates leaks. Install a pressure regulator or check your water heater pressure relief valve to maintain safe levels.
Pipe Repair Costs: What to Expect
DIY Pipe Repair Costs: For minor repairs, expect to spend $20–$100 on materials like couplings, pipe sections, primer, cement, or solder. A pipe wrench or plumbing tools kit may cost $30–$150, but these are reusable for future projects.
Professional Pipe Repair Costs: Hiring a plumber typically ranges from $200–$600 for a standard repair, depending on pipe access and material. Emergency or after-hours service can cost $800+. Complex jobs like repiping a section of your home may cost $1,500–$3,500.
*Prices are estimates based on 2026 market rates. Actual costs may vary by location, pipe accessibility, and the extent of the damage.
Essential Pipe Repair Tools & Equipment
Pipe Wrenches
Heavy-duty wrenches with toothed jaws for gripping and turning pipes. Essential for galvanized and larger-diameter pipes.
Plumbing Tools Kits
All-in-one kits with pipe cutters, deburring tools, wrenches, and more. Great for DIYers who want a complete setup for pipe repair and other home systems work.
Tape Measures
Accurate measurements are critical for cutting replacement pipes and planning repairs. Choose a durable, locking tape measure.
Screwdriver Sets
Use for removing access panels, fixtures, and hose clamps. A variety of flathead and Phillips screwdrivers is essential.
Frequently Asked Questions About Pipe Repair
Can I use epoxy putty for pipe repair?
Yes, epoxy putty can be used as a temporary fix for small cracks or pinhole leaks. It's not a permanent solution but can hold until you can perform a proper repair. Ensure the pipe is dry and clean before applying the putty.
How do I fix a leaking pipe joint without soldering?
Push-to-connect fittings (like SharkBite) are a great alternative to soldering for copper pipe repair and PEX. They require no special tools and create a watertight seal. Always ensure the pipe ends are clean and deburred before insertion.
What should I do if a pipe bursts?
Immediately shut off the main water valve. Open faucets to drain the system. Apply a pipe repair clamp or rubber patch as a temporary fix, then call a plumber for professional repair. For pipe repair in freezing conditions, also check weatherstripping and insulation in the affected area.
How much does it cost to fix a leaky pipe?
A DIY leaky pipe repair typically costs $20–$100 in materials. Professional repairs range from $200–$600, depending on the location and complexity. Preventive maintenance, like installing water heater anode rods, can help extend pipe life.
Is pipe repair covered by homeowners insurance?
Most policies cover sudden and accidental pipe bursts but not gradual leaks or neglect. Check your policy and consider adding a water damage endorsement if needed. For major issues, consult your insurance provider and a licensed plumber.
Ready to Tackle Your Pipe Repair Project?
Equip yourself with the right tools and materials for a successful DIY pipe repair. Shop our recommended products below and get started today!
Shop Pipe Repair Tools →