Master the Art of Joinery
Learn essential woodworking joints, discover the right tools, and build furniture that lasts a lifetime. Your complete guide to joinery techniques.
Explore Joinery GuideJoinery is the foundation of all woodworking. Whether you're building a simple shelf or a complex piece of heirloom furniture, the joints you choose determine the strength, durability, and beauty of your project. This comprehensive guide covers everything from basic butt joints to advanced mortise and tenon techniques, helping you select the right method for every application. With the right knowledge and essential tools, you can create professional-quality pieces that stand the test of time.
Types of Woodworking Joints
Butt Joint
The simplest and most common joint. Two pieces of wood are joined end-to-end or edge-to-edge. Best for basic frames and boxes when reinforced with screws or nails and glue.
- Best for: Quick builds, basic framing
- Strength: Low (needs reinforcement)
- Tools needed: Saw, glue, clamps
Dado Joint
A slot cut across the grain of one piece to accept another. Perfect for bookshelves and cabinet carcasses. Provides excellent strength and alignment.
- Best for: Shelves, cabinets, drawers
- Strength: Very strong
- Tools needed: Table saw, router
Mortise & Tenon
A classic joint where a tenon (protruding piece) fits into a mortise (hole). Used extensively in dining tables, chairs, and bed frames. Known for exceptional strength.
- Best for: Furniture frames, doors
- Strength: Outstanding
- Tools needed: Chisels, drill press, saw
Dovetail Joint
Interlocking pins and tails create a joint that resists pulling apart. The hallmark of fine furniture and woodworking craftsmanship, often seen in drawer construction.
- Best for: Drawers, jewelry boxes, fine furniture
- Strength: Exceptional tensile strength
- Tools needed: Dovetail saw, chisels, router jig
Biscuit Joint
Uses a football-shaped wooden biscuit in matching slots. Ideal for aligning panels and creating invisible seams. A favorite for coffee tables and cabinet doors.
- Best for: Panel glue-ups, edge joining
- Strength: Good alignment strength
- Tools needed: Biscuit joiner
Finger Joint (Box Joint)
Interlocking rectangular fingers create a strong, decorative joint. Often used for boxes, drawers, and jewelry chests. Provides excellent surface area for gluing.
- Best for: Boxes, chests, small projects
- Strength: Very strong with glue
- Tools needed: Table saw with jig, router
Essential Tools for Joinery
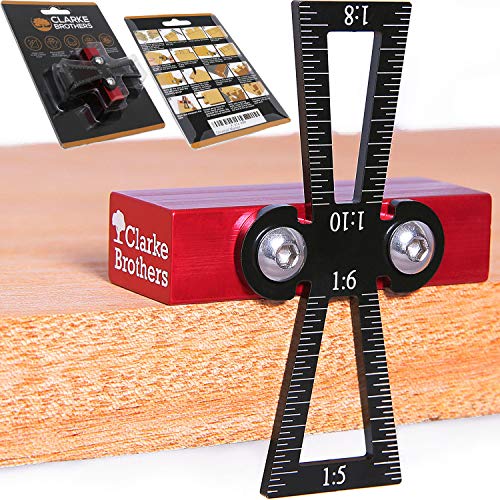
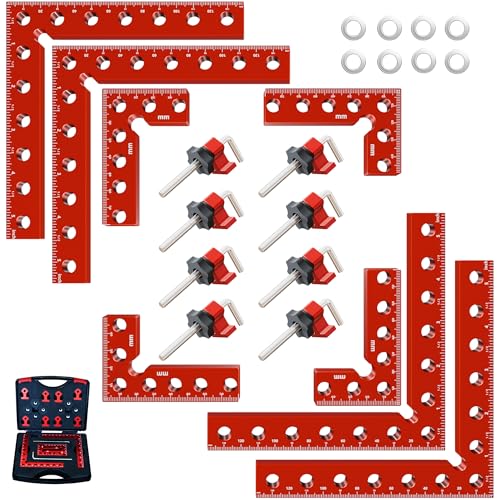
Having the right tools makes the difference between frustrating attempts and clean, precise joints. Here's what you need to get started:
Step-by-Step Joinery Process
1. Plan Your Joint
Select the appropriate joint type based on your project's requirements. Consider wood type, end use, and aesthetic preferences. For example, use dining tables need strong mortise and tenon joints, while shelving benefits from dado joints.
2. Mark and Measure Precisely
Use a marking knife for accuracy and a combination square for perfectly straight lines. Measure twice, cut once is the golden rule. Learn more about reading blueprints to ensure your measurements are project-ready.
3. Cut and Fit
Make your cuts carefully, then test fit each joint. The ideal joint should require light pressure to assemble – not too tight and not too loose. Use clamps to hold pieces while you check alignment.
4. Apply Glue and Assemble
Apply a thin, even layer of wood glue to all mating surfaces. Assemble and clamp firmly. Clean excess glue with a damp cloth before it dries for a professional finish.
5. Sand and Finish
Once dry, sand the joint smooth, starting with coarse grit and progressing to fine. Apply your chosen finish – oil, varnish, or paint. Proper wood finishing protects your work and enhances the natural beauty of the wood.
Joinery Quick Reference
| Joint Type | Best Use | Difficulty | Tools Required |
|---|---|---|---|
| Butt Joint | Framing, basic boxes | Beginner | Saw, glue, screws |
| Dado Joint | Shelves, cabinets | Intermediate | Table saw, router |
| Mortise & Tenon | Furniture frames, tables | Advanced | Chisels, drill press |
| Dovetail | Drawers, fine boxes | Advanced | Dovetail saw, chisels |
| Biscuit | Panel glue-ups | Intermediate | Biscuit joiner |
| Finger Joint | Boxes, chests | Intermediate | Table saw with jig |
Pro Tip: Master the Basics First
Before tackling complex joints like dovetails or mortise and tenon, practice on scrap wood. Start with butt joints and rabbets, then progress to dadoes and biscuit joints. This builds muscle memory and confidence. Also, invest in quality clamps – they are the unsung heroes of precision joinery. And remember, a sharp chisel is safer and more effective than a dull one – learn proper tool sharpening techniques to keep your edge tools performing at their best.
Common Joinery Mistakes to Avoid
❌ Inaccurate Measurements
Always measure twice. A 1/16" error can ruin a joint. Use a sharp pencil or marking knife for precision.
❌ Too Much Glue
Excess glue makes a mess and can affect finish. Apply a thin, even coat – enough to cover the surface but not squeeze out excessively.
❌ Not Using Clamps
Clamps ensure even pressure and tight joints. Without them, joints can gap and weaken over time. Invest in a variety of clamps for different applications.
❌ Dull Tools
Dull chisels and saws tear wood rather than cut cleanly. Learn how to sharpen your tools for clean, precise joinery.
Ready to Start Your Joinery Project?
Browse our top-rated joinery tools, including routers, chisels, clamps, and precision measuring instruments. We've curated the best equipment to help you achieve professional results.
Shop Joinery Tools