Complete Guide to DIY Privacy Screens
Transform your outdoor space with stylish privacy screens. From materials and installation to design ideas — find everything you need to create your private retreat.
Shop Top-Rated Privacy ScreensWhether you're looking to block out nosy neighbors, create a cozy corner on your patio, or add a decorative element to your garden, privacy screens are the perfect solution. This guide covers everything from types and materials to installation tips and cost considerations. By the end, you'll be ready to choose and install the ideal privacy screen for your home.
Why Install a Privacy Screen?
Privacy screens are more than just functional barriers — they add aesthetic value, increase property appeal, and can even reduce noise and wind. Here are the top benefits:
- Enhanced Privacy: Create a secluded space for relaxation, dining, or entertaining.
- Noise Reduction: Dense materials like wood or composite can muffle street noise.
- Wind Protection: Solid screens act as windbreaks, making your outdoor area more comfortable.
- Visual Appeal: Add color, texture, and a modern or rustic feel to your landscape.
- Property Value: Well-designed privacy features can boost curb appeal and resale value.
Types of Privacy Screens
Choosing the right type depends on your space, budget, and style preferences. Below are the most popular options.
1. Freestanding Screens
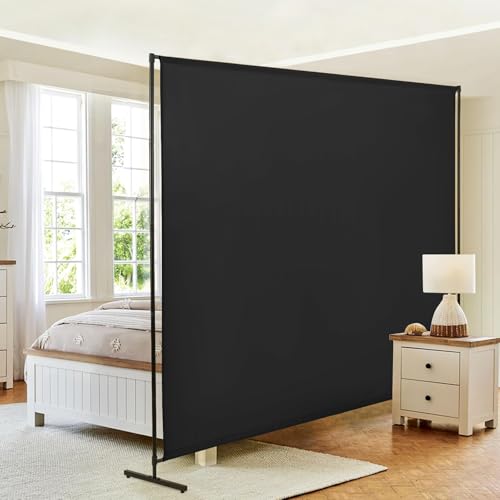
These are portable and versatile. They don't require permanent installation, making them ideal for renters or temporary setups. Common materials include wood, metal, and wicker.
2. Wall-Mounted Screens
Attached directly to an existing wall or structure, these screens save floor space and provide a permanent privacy solution. They work well on patios and balconies.
3. Fence-Mounted Extensions
If you already have a fence, you can add a trellis or lattice extension to increase height and privacy. This is a cost-effective way to upgrade your existing fence installation.
4. Planter Screens
Combining greenery with structure, planter screens use built-in boxes for climbing plants or tall shrubs. They offer natural privacy and are perfect for container gardening enthusiasts.
Privacy Screen Materials: Pros, Cons & Costs
Each material has unique characteristics. Use this comparison to find the best fit for your project.
| Material | Durability | Maintenance | Cost (per panel) | Best For |
|---|---|---|---|---|
| Wood | High (if sealed) | Stain/seal every 2-3 years | $150–$400 | Natural look, custom builds |
| Composite | Very high | Low (no sealing) | $250–$600 | Modern, low-maintenance |
| Metal (Aluminum/Steel) | Extremely high | Very low (rust-resistant coating) | $200–$500 | Industrial, urban settings |
| Vinyl | High | Very low (wipe clean) | $180–$350 | Budget-friendly, easy install |
| Bamboo | Moderate | Moderate (treat annually) | $120–$280 | Eco-friendly, tropical vibe |
Prices are approximate and vary by size, finish, and retailer. Always check current pricing before purchase.
How to Install a Privacy Screen: Step-by-Step
Installing a privacy screen is a manageable DIY project. Follow these steps for a professional result.
- Plan & Measure: Decide on the location, height, and width. Check local building codes and HOA rules.
- Choose Your Material: Select based on budget, durability, and style. Refer to the comparison table above.
- Prepare the Area: Clear the space, level the ground, and mark post positions.
- Set Posts (if freestanding): Dig holes, add concrete, and set posts. Ensure they are perfectly vertical.
- Attach Panels: Follow manufacturer instructions. For wall-mounted, use heavy-duty anchors. For fence extensions, secure with brackets.
- Finishing Touches: Seal wood, paint, or add climbing plants for a natural look. Consider adding garden lighting to highlight your new screen.
Pro Tip: For a unique look, combine different materials. For example, use a wood frame with metal mesh inserts, or add a trellis on top for climbing vines. Check out pergola plans for inspiration on integrating screens into larger structures.
Creative Privacy Screen Ideas
Privacy screens don't have to be boring. Here are some design concepts to spark your creativity:
- Living Wall: Use a planter screen with climbing roses or jasmine. This also aligns with vegetable gardening principles by creating microclimates.
- Geometric Patterns: Laser-cut metal or wood panels with geometric shapes add a modern, artistic touch.
- Mix of Heights: Combine tall screens with low planters or seating to create depth and visual interest.
- Reclaimed Materials: Use old doors, windows, or pallets for a rustic, eco-friendly screen. This is a great upcycling idea.
- Integrated Storage: Build screens with built-in shelves or cabinets for outdoor storage and display.
For more outdoor living inspiration, explore our guides on outdoor furniture builds and fire pit builds to complete your backyard oasis.
Budgeting for Your Privacy Screen
Costs vary widely based on materials, size, and whether you hire a professional. Here's a rough breakdown:
- DIY Materials Only: $200 – $800 (for a standard 6x8 ft panel setup)
- Pre-made Panels: $150 – $600 per panel (depending on material)
- Professional Installation: Add $300 – $800 for labor
- Permits: Usually not required for screens under 6ft, but check local rules. See our permits guide for details.
For a more accurate estimate, use our material estimators to calculate the exact quantities needed for your project.
Maintaining Your Privacy Screen
To keep your privacy screen looking great and lasting for years, follow these maintenance tips:
- Wood: Clean annually and apply a fresh coat of sealant or stain every 2-3 years. Protect against moisture and pests.
- Metal: Inspect for scratches and touch up with rust-resistant paint. Wash with mild soap and water.
- Vinyl & Composite: Simply hose down or wipe with a sponge. Avoid abrasive cleaners.
- Bamboo: Apply a natural oil annually to prevent cracking and fading.
Regular upkeep ensures your screen remains a beautiful and functional part of your outdoor garden for years. For broader home care, check out our seasonal maintenance checklist.
Frequently Asked Questions
Do I need a permit for a privacy screen?
Typically, screens under 6 feet don't require a permit. However, always check with your local building department and HOA. Our permits guide provides more details.
Can I install a privacy screen on a balcony?
Yes! Freestanding screens or wall-mounted options work well on balconies. Ensure they are securely fastened and comply with building regulations.
How do I clean a privacy screen?
Use a mild soap and water solution. For wood, avoid pressure washing as it can damage the surface. Check your material's specific care instructions.
Are privacy screens good for noise reduction?
Solid panels (wood, composite, vinyl) can reduce noise by up to 30%. For more soundproofing, consider combining with soundproofing techniques.
Can I grow plants on my privacy screen?
Absolutely! Many screens are designed with trellises or can be paired with planters. This is a fantastic way to integrate container gardening into your privacy solution.
Ready to Build Your Privacy Screen?
With the right information and tools, installing a privacy screen is a rewarding DIY project that enhances both the function and beauty of your outdoor space. Whether you choose wood, metal, or composite, the key is to plan carefully and select materials that suit your style and budget.
Browse the recommended products below to find high-quality privacy screens and accessories. Happy building!