Complete Interior Painting Guide: Colors, Prep & Pro Techniques
Transform your home with the perfect paint. Learn color psychology, step-by-step preparation, professional application methods, and must-have tools for a flawless, long-lasting finish.
Start Your Painting ProjectWhy Interior Painting Matters: A fresh coat of paint is one of the most cost-effective ways to transform your space. Whether you're refreshing a single room or repainting your entire home, understanding the right techniques, tools, and color choices ensures professional results that last for years.
1. Choosing the Right Colors: Psychology & Trends
Color has a profound impact on mood, perception, and the overall feel of a room. Before you pick up a brush, take time to understand color palettes and how they influence your space.
Understanding Color Psychology: Warm tones like reds, oranges, and yellows evoke energy and warmth, making them ideal for social spaces like living rooms and dining areas. Cool colors such as blues, greens, and purples promote calmness and concentration, perfect for bedrooms and home offices. Neutrals like whites, grays, and beiges provide a versatile backdrop that works in any room.
Current Trends (2026): Earthy tones like terracotta, sage green, and warm clay are dominating interior design. Deep, moody hues like navy blue and charcoal gray are also popular for creating dramatic accent walls. For a modern, airy feel, off-whites with subtle undertones remain a classic choice.
2. Accent Walls & Textured Finishes
An accent wall is a fantastic way to add visual interest and define a space without overwhelming it. Choose a wall that naturally draws the eye – such as the wall behind a bed, a fireplace, or a sofa – and paint it a contrasting color.
For a more sophisticated look, consider textured finishes. Techniques like sponging, rag-rolling, or using specialty rollers can add depth and character to your walls. Textured finishes are particularly effective in hiding minor imperfections and adding a tactile element to your decor.
3. Preparation: The 80% of a Great Paint Job
Skipping prep work is the most common DIY mistake. Proper preparation ensures paint adheres well, looks smooth, and lasts longer.
1. Clean the Walls: Dust, dirt, and grease can prevent paint from sticking. Use a sponge or cloth with mild detergent and warm water. Rinse thoroughly and let dry.
2. Repair Imperfections: Fill nail holes and cracks with spackling compound. Sand smooth with fine-grit sandpaper. For larger issues, consider drywall repair techniques.
3. Sand the Surface: Lightly sand glossy surfaces to create a "tooth" for the new paint to grip. Wipe away dust with a tack cloth.
4. Protect Your Space: Cover floors with drop cloths, remove outlet covers, and use painter's tape along trim, windows, and ceilings. This is also the perfect time to consider molding and trim upgrades.
5. Prime the Walls: Primer is essential, especially when painting over dark colors, stains, or new drywall. It provides a uniform base and improves paint coverage. Don't forget to caulk gaps between trim and walls for a seamless look.
4. Choosing the Right Paint & Finish
Understanding paint types and finishes is crucial for both aesthetics and durability.
Paint Types:
• Water-based (Latex): Easy to clean with soap and water, low odor, dries quickly. Ideal for walls and ceilings.
• Oil-based (Alkyd): More durable, provides a harder finish, but requires solvents for clean-up. Best for trim, cabinets, and high-moisture areas.
Paint Finishes (from least to most sheen):
• Flat/Matte: No shine, hides imperfections well. Good for low-traffic areas like bedrooms and ceilings.
• Eggshell: Subtle sheen, easy to clean. Perfect for living rooms and hallways.
• Satin: Smooth, velvety finish with more durability. Great for bathrooms, kitchens, and kids' rooms.
• Semi-Gloss: High shine, very durable, moisture-resistant. Best for trim, doors, and cabinets.
• High-Gloss: Very shiny, extremely durable. Used for furniture and specialty projects.
5. Professional Painting Techniques & Essential Tools
Using the right techniques and tools will save you time and deliver a flawless finish.
Essential Tools:
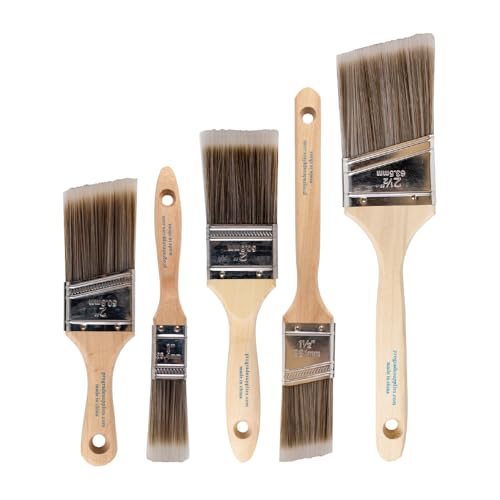
• Quality Paint Brushes: Invest in a good angled brush for cutting in (edges and corners) and a flat brush for larger areas. Synthetic bristles are best for water-based paints.
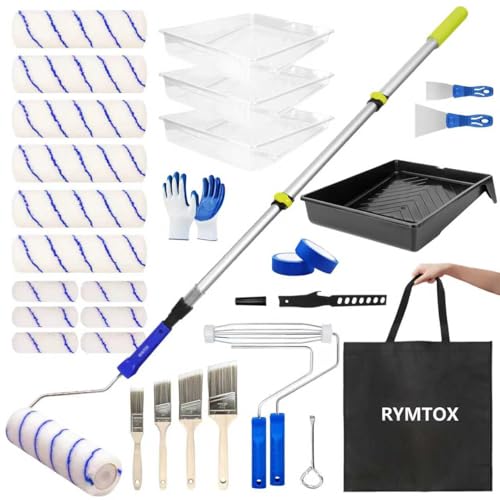
• Paint Rollers: Use a roller with the correct nap length. ⅜ inch is standard for smooth walls, while ½ inch works better for textured surfaces. A roller tray and extension pole are also essential.
• Paint Sprayers: For large projects or furniture, a paint sprayer can save significant time and provide a uniform finish.
• Drop Cloths & Tape: Protect your floors and trim with high-quality drop cloths and painter's tape.
Application Techniques:
• Cutting In: Always cut in first – paint along edges, corners, and trim with an angled brush. This creates a clean border before you roll.
• Rolling: Load your roller evenly and use a "W" or "M" pattern to distribute paint. Then, roll vertically for an even, smooth finish. Work in manageable sections and maintain a wet edge to avoid lap marks.
• Two-Coat System: Two coats are almost always necessary for full coverage and color depth. Allow the first coat to dry completely according to the manufacturer's instructions before applying the second.
6. Wallpaper & Specialty Finishes
If you're looking for a pattern or texture that paint alone can't provide, consider wallpaper installation or specialty finishes.
Modern wallpapers are much easier to install and remove than their predecessors. They are available in a vast array of patterns, from subtle textures to bold prints, and are perfect for creating a stunning focal point.
Other options include limewash paint, metallic finishes, or chalk paint for furniture. These finishes add a unique, customized look to your home. Experiment with painting hacks to achieve trendy effects without hiring a professional.
7. Post-Painting Care & Maintenance
Your new paint job will look great for years with proper care.
Drying Time: Allow ample time for the paint to cure (up to 30 days for oil-based paints) before heavy cleaning.
Cleaning: For water-based paints, wash walls gently with a soft sponge and mild soapy water. Avoid abrasive cleaners. Regular dusting can prevent dirt buildup.
Touch-Up Tips: Keep leftover paint in a tightly sealed container for touch-ups. Label the can with the room and date. For larger touch-ups, repaint the entire wall section to avoid visible differences. If you're planning a larger refresh, explore home renovation ideas to complement your new paint.
When to Repaint: Generally, repaint every 3-5 years for high-traffic areas and 5-7 years for other rooms. However, you can repaint sooner if you want to update your home decor or follow current trends.
8. Cost Estimates & Budgeting for Your Painting Project
Knowing the average costs helps you plan effectively.
Cost Per Room: The cost to professionally paint a room ranges from $800–$2,500, depending on room size, ceiling height, and paint quality. DIY projects can significantly reduce costs.
Paint Costs: A gallon of high-quality paint covers approximately 350–400 square feet and costs between $35 and $70. For a standard 12x12 room, you'll typically need 2 gallons for two coats.
Tool Costs: Basic tools (brushes, rollers, tape, drop cloths) cost around $50–$100. For larger projects, consider renting or investing in a paint sprayer ($100–$500).
Budget Tips:
• Get multiple color samples and test on your walls before committing.
• Buy quality paint from a reputable brand – it often has better coverage and durability, saving you time and money in the long run.
• Compare budget estimating options online or use project planning calculators.
9. Troubleshooting Common Painting Problems
Even professionals encounter issues. Here’s how to avoid or fix the most common paint problems:
Bubbling/Blisters: Caused by painting over a damp, dirty, or previously glossy surface. Always prime and ensure surfaces are clean and dry.
Peeling Paint: Often due to moisture. Fix the source of moisture first (e.g., gutter installation or drainage solutions) before repainting.
Roller Marks: Apply paint evenly and maintain a wet edge. Using the correct nap roller and not overloading it with paint will also help.
Streaks/Fading: Ensure proper mixing and apply two even coats. Sun exposure can cause fading over time; consider UV-protective paint for sun-drenched rooms.
Ready to Transform Your Home?
Choose the perfect color, prep like a pro, and use the best tools for a stunning, long-lasting finish. Start your interior painting project today!
Explore More DIY Guides