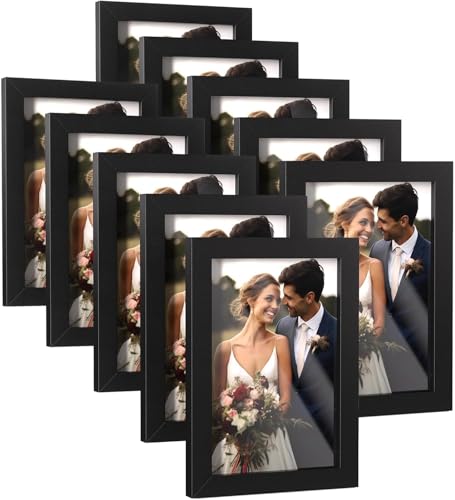
Picture Frames: DIY Wooden Frame Plans & Techniques
Learn how to build custom picture frames that showcase your photos and artwork. From basic miter joints to advanced spline joinery, discover everything you need to create professional-quality frames.
Explore Frame GuideBuilding your own picture frames is one of the most rewarding woodworking projects. Whether you're framing a cherished family photo, a piece of art, or a mirror, custom frames let you control every detail — from wood species and profile to finish and hardware. This guide covers everything from material selection to advanced joinery, ensuring your frames are both beautiful and durable.
Why Build Your Own Picture Frames?
📐 Perfect Fit & Custom Sizes
- No more settling for standard sizes — create frames for any artwork, photo, or mirror.
- Adjust proportions to match your interior design and wall space.
- Perfect for non-standard dimensions or vintage pieces.
🪵 Control Over Materials
- Choose from hardwoods like oak, walnut, maple, or cherry for durability and beauty.
- Select the exact profile, thickness, and finish that matches your decor.
- Use sustainable or reclaimed wood for eco-friendly projects.
🔧 Cost-Effective & Rewarding
- Save money compared to custom framing services, especially for large pieces.
- Develop valuable woodworking skills like measuring, cutting, and joinery.
- Create gifts that are personal, handmade, and cherished.
🎨 Design Flexibility
- Experiment with different profiles: flat, beveled, ornate, or rustic.
- Add decorative elements like splines, dowels, or inlays.
- Choose between natural, stained, painted, or gilded finishes.
Essential Tools & Materials
Before starting your frame project, ensure you have the right tools. While some tools are optional, having the right equipment ensures accuracy and safety.
Must-Have Tools
- ✓ Miter Saw (or miter box with backsaw)
- ✓ Tape Measure & combination square
- ✓ Clamps (band clamps or corner clamps)
- ✓ Wood Glue & glue applicator
- ✓ Screwdrivers (for hardware installation)
Materials
- ✓ Hardwood or softwood (poplar, oak, maple, pine)
- ✓ Lumber – S4S (surfaced four sides) for ease
- ✓ Glass or acrylic (for glazing)
- ✓ Backing board (foam core or MDF)
- ✓ Hanging hardware (wire, D-rings, sawtooth)
Step-by-Step Frame Building Process
- Measure your artwork: Add ¼" to ½" to each dimension for the glass and matting (if used). This is your frame's inside dimension.
- Calculate frame size: Add the width of your frame profile (e.g., 2") to the inside dimension on each side. This gives the overall outside dimension.
- Cut the molding: Use a miter saw set to 45° to cut four pieces with precision. Ensure opposite pieces are exactly the same length.
- Test fit the corners: Dry-fit all four pieces on a flat surface. Adjust cuts if gaps are visible.
- Apply glue: Spread wood glue on each miter joint. Use band clamps or corner clamps to secure the frame while drying.
- Reinforce joinery (optional): For larger frames, add spline joints or dowels for extra strength.
- Sand and finish: Sand all surfaces smooth (120–220 grit). Apply your choice of stain, paint, or clear coat.
- Install glass, backing, and hardware: Secure the glass and backing with points or brads, then attach hanging hardware.
💡 Pro Tip: For flawless miters, use a miter saw with a fine-tooth blade (60+ teeth). Test cuts on scrap wood first. And always cut slightly longer than needed, then trim to final length — you can remove wood, but you can't add it back!
Finishing & Hardware Selection
The finish and hardware you choose can elevate your frame from basic to gallery-worthy. Consider the style of the room and the artwork when making your selections.
Finish Options
- Natural: Clear coat (polyurethane, varnish) for a raw wood look.
- Stained: Oil- or water-based stains in various colors.
- Painted: Acrylic or enamel paint for a solid, modern look.
- Gilded: Gold or silver leaf for ornate, antique-style frames.
Hanging Hardware
- Sawtooth hangers: Best for smaller, lightweight frames.
- D-rings with wire: Ideal for medium to large frames, allows leveling.
- Picture wire: Use with D-rings; provides flexibility.
- Heavy-duty hangers: For large mirrors or heavy frames.
Common Mistakes to Avoid
- Inaccurate measurements: Always double-check your inside and outside dimensions before cutting.
- Poor miter cuts: Ensure your saw blade is sharp and the miter gauge is calibrated to 45°.
- Inadequate clamping: Use corner clamps or band clamps to ensure tight, gap-free joints.
- Forgetting expansion: Wood expands and contracts with humidity. Allow for slight movement in larger frames.
- Rushing the finish: Sand thoroughly between coats and allow adequate drying time for a professional result.
Start Your First Frame Today
Building custom picture frames is a skill that blends art and craft. Whether you're framing a family photo, a painting, or a cherished memory, the process is deeply satisfying. With the right tools, materials, and techniques, you'll create heirloom-quality pieces that bring joy for years to come.
Ready to start? Explore our woodworking guides for more project ideas, or check out our tool recommendations to build your workshop.