Tool Calibration Guide
Master the art of precision with our comprehensive guide to calibrating power tools, measuring instruments, and workshop equipment.
Why Tool Calibration Matters for Every Workshop
Accurate tool calibration is the foundation of professional-quality workmanship. Whether you're a seasoned woodworker, a DIY enthusiast, or a professional contractor, properly calibrated tools ensure your projects meet exact specifications, reduce material waste, and prevent costly mistakes. From miter saws to laser levels, every precision tool in your workshop requires regular adjustment to maintain peak performance.
This comprehensive guide covers everything you need to know about calibrating tools – from basic measuring devices to advanced power tools. We'll walk you through the essential procedures, frequency recommendations, and expert tips to keep your workshop running at maximum accuracy.
Understanding Tool Calibration
Tool calibration is the process of adjusting and verifying the accuracy of measuring instruments and power tools against known standards. Regular calibration ensures your tools deliver consistent, reliable results – crucial for woodworking, home improvement, and professional applications where precision matters.
Step-by-Step Calibration Guide
1. Calibrate Measuring Tools
- Tape Measures: Check against a known standard ruler. Replace if the hook mechanism is loose or the markings are worn.
- Laser Levels: Place on a level surface and rotate 180° – the bubble should remain centered. Adjust the vial screws if needed.
- Calipers & Micrometers: Use calibration blocks or gauge pins to verify zero reading and linearity.
- Square Tools: Check squareness using the 5-cut method or against a known square reference.
2. Calibrate Power Tools
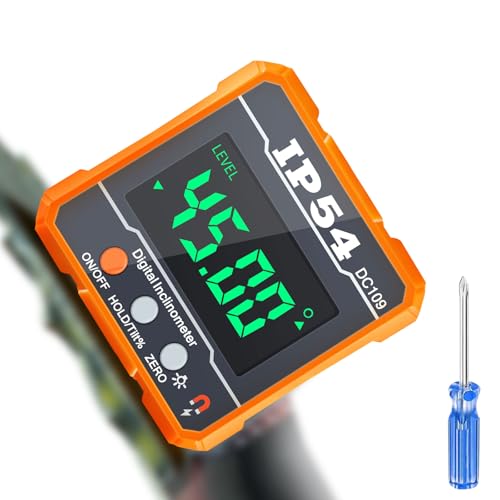
- Miter Saws: Adjust the bevel and miter angles using a digital angle gauge. Check the fence for squareness.
- Table Saws: Align the blade parallel to the miter slots. Adjust the fence to be perfectly parallel to the blade.
- Routers: Check bit concentricity and depth adjustment accuracy using a dial indicator.
- Drill Presses: Ensure the table is square to the spindle and check for runout using a dial indicator.
3. Calibrate Specialty Tools
- Torque Wrenches: Test against a torque analyzer or use a weight-and-lever method for verification.
- Moisture Meters: Use known moisture samples or calibration standards to verify readings.
- Multimeters & Testers: Compare readings against known voltage sources and resistance standards.
- Pressure Gauges: Test against a certified master gauge using a dead-weight tester.
Tool Calibration Schedule & Frequency
Regular calibration is essential for maintaining accuracy. Here's a recommended schedule for different types of workshop tools:
| Tool Type | Calibration Frequency | Recommended Standard |
|---|---|---|
| Tape Measures & Rules | Every 12 months | NIST traceable ruler |
| Laser Levels & Transit | Every 6 months | Known level surface |
| Miter Saws & Table Saws | Every 3-6 months | Digital angle gauge |
| Calipers & Micrometers | Every 12 months | Calibration blocks |
| Torque Wrenches | Every 12 months or 5,000 cycles | Torque analyzer |
| Multimeters | Every 12 months | Known voltage source |
| Square Tools | Every 6-12 months | Known square reference |
Pro Calibration Tips for Better Accuracy
- Keep a calibration log: Record all calibration dates, adjustments, and results for each tool in your workshop.
- Use proper reference standards: Always calibrate against certified, traceable standards for the most accurate results.
- Consider temperature effects: Calibrate tools at room temperature (68-72°F) for consistency, as extreme temperatures affect measurements.
- Clean tools before calibration: Remove debris, dust, and buildup that can affect the accuracy of measurement.
- Trust your intuition: If a tool consistently delivers accurate work, verify its calibration to understand when it might drift.
- Invest in quality calibration tools: A good digital angle gauge or dial indicator is a worthwhile investment for long-term accuracy.
Benefits of Regular Tool Calibration
Maintaining a regular tool calibration schedule offers significant advantages for both hobbyists and professionals:
- ✓ Consistent quality: Tools produce accurate work every time, reducing rework and material waste.
- ✓ Safety improvement: Properly calibrated tools reduce the risk of kickback, binding, and other accidents.
- ✓ Professional results: Achieve precise cuts, accurate measurements, and perfect fits on every project.
- ✓ Cost savings: Avoid expensive material waste and rework caused by inaccurate tool settings.
- ✓ Tool longevity: Regular inspection and adjustment help identify potential issues before they become major problems.
By incorporating tool calibration into your regular workshop maintenance routine, you'll work more efficiently, produce higher-quality results, and build confidence in your tools' performance. Whether you're using cordless drills, circular saws, or precision measuring instruments, a well-calibrated workshop is the key to professional-grade workmanship.
Common Calibration Mistakes to Avoid
Even experienced professionals make errors when calibrating tools. Here are some common pitfalls to watch for:
- ✗ Overlooking temperature effects: Tools can expand or contract with temperature changes, affecting calibration accuracy.
- ✗ Using worn or damaged reference standards: Old or damaged calibration blocks give false readings.
- ✗ Skipping zero-point verification: Always check zero before calibration to ensure proper baseline readings.
- ✗ Not documenting results: Without proper records, you can't track tool drift over time.
- ✗ Rushing the process: Calibration requires patience and careful attention to detail for accurate results.
Essential Tools for Calibration
To properly calibrate tools, you'll need the right equipment for the job. Here's what you need for a well-equipped calibration station:
- • Digital Angle Gauge: Essential for calibrating miter saws, table saws, and other angle-critical tools.
- • Dial Indicator with Base: For checking runout, parallelism, and squareness of tool components.
- • Calibration Blocks & Gauges: Precision-ground blocks in various sizes for calibrating measuring tools.
- • Precision Squares: Engineer-grade squares for verifying tool squareness and geometry.
- • Feeler Gauges: For precise gap measurements during tool adjustments.
Having these calibration tools on hand allows you to verify and adjust your workshop equipment regularly, ensuring every project meets your exacting standards.
Ready to Calibrate Your Tools?
Browse our selection of precision tools and calibration equipment to keep your workshop performing at its best.
Explore Tools & Equipment