The Complete Caulking Guide for Homeowners
Master the art of caulking with our step-by-step guide. Learn which caulk to use for bathrooms, kitchens, windows, and more. Discover pro tips for a flawless finish every time.
Caulking is one of the most affordable and effective ways to protect your home from water damage, drafts, and pests. Yet, many homeowners struggle with choosing the right product and applying it correctly. This caulking guide covers everything you need to know — from understanding different caulk types to preparing surfaces, applying like a pro, and avoiding common mistakes.
Whether you're sealing a bathroom tub, filling gaps around windows, or tackling a kitchen backsplash, the right technique makes all the difference. By the end of this guide, you'll have the confidence to handle any caulking project with professional results.
What Is Caulking and Why Is It Important?
Caulking is the process of sealing joints, seams, and gaps in various surfaces using a waterproof or water-resistant material. It's commonly used in bathrooms, kitchens, windows, doors, and exterior siding to prevent water intrusion, air leaks, and insect entry.
Proper caulking offers several key benefits:
- Prevents water damage: Seals gaps that can lead to rot, mold, and structural damage.
- Improves energy efficiency: Reduces drafts by sealing air leaks around windows and doors.
- Enhances aesthetics: Provides a clean, finished look at joints and transitions.
- Protects against pests: Seals entry points for insects and rodents.
Ignoring caulking can lead to costly mold remediation, floor repair, and even structural repairs. Regular maintenance and proper application are essential to protecting your home's value.
Types of Caulk: Which One Should You Use?
Choosing the right caulk for your project is critical. Using the wrong type can lead to cracking, peeling, or poor adhesion. Below is a comparison of the most common caulk types available on the market.
| Caulk Type | Best For | Key Features | Approx. Price |
|---|---|---|---|
| Silicone | Bathrooms, kitchens, windows, tiles | Waterproof, flexible, mildew-resistant, long-lasting | $8–$15 per tube |
| Acrylic Latex | Interior walls, baseboards, crown molding | Paintable, easy to clean up, low odor | $5–$10 per tube |
| Polyurethane | Exterior joints, concrete, masonry | Extremely durable, strong adhesion, weather-resistant | $12–$20 per tube |
| Butyl Rubber | Roofs, gutters, flashing, metal | Excellent weather resistance, stays flexible | $10–$18 per tube |
| Specialty (Fireproof, Marine, etc.) | Specific applications (fireplaces, boats) | High heat resistance or marine-grade | $15–$30 per tube |
For most home improvement projects, silicone is the top choice for wet areas, while acrylic latex is ideal for interior trim work that requires painting. If you're working outdoors, polyurethane or butyl rubber offer superior durability against the elements.
Essential Tools for Caulking
Having the right tools ensures a smooth, professional-looking caulk job. Here's what you'll need:
- Caulk gun: Choose a smooth-rod or ratcheting type for consistent flow.
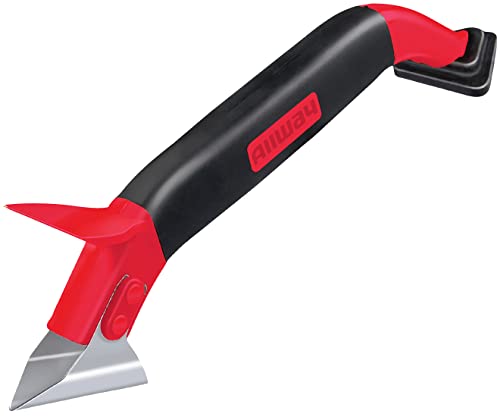
- Caulk remover tool: Helps scrape out old caulk quickly.
- Utility knife: For cutting the caulk tube tip and scoring old caulk.
- Putty knife: Useful for scraping away stubborn residue.
- Isopropyl alcohol or mineral spirits: For cleaning surfaces before application.
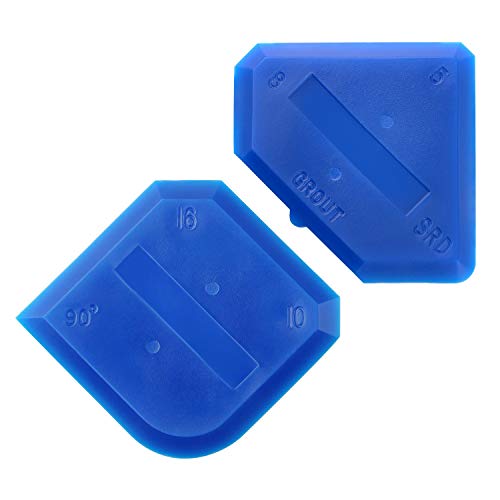
- Caulk smoothing tools: Creates a neat, uniform bead (fingers or specialized tools).
- Rags or paper towels: For wiping up excess and cleaning up.
If you're new to caulking, consider watching a few DIY for beginners videos to familiarize yourself with the process. Practice on a scrap piece of wood or cardboard before tackling your actual project.
Step-by-Step Caulking Guide
Follow these steps to achieve a professional-quality caulk finish every time.
- Prepare the surface: Remove old caulk using a caulk remover tool or utility knife. Clean the area thoroughly with isopropyl alcohol to remove dust, grease, and soap scum. Ensure the surface is completely dry.
- Apply painter's tape: (Optional) Tape along both sides of the joint to create straight, clean lines. This is especially helpful for beginners.
- Cut the caulk tube tip: Cut the nozzle at a 45-degree angle. The size of the opening should match the width of your gap — start small and cut larger if needed.
- Load the caulk gun: Insert the tube and puncture the inner seal with a long nail or the built-in tool on some guns.
- Apply the caulk: Hold the gun at a 45-degree angle. Squeeze the trigger while moving the gun steadily along the joint. Apply consistent pressure and keep the nozzle tip slightly ahead of the caulk bead.
- Smooth the bead: Use a wet finger or a smoothing tool to press and smooth the caulk into the joint. Wipe away excess on a rag. If using tape, remove it before the caulk dries.
- Let it cure: Allow the caulk to dry completely according to the manufacturer's instructions. Most silicone caulks require 24 hours to cure fully.
Common Caulking Mistakes and How to Avoid Them
Even experienced DIYers make mistakes. Here are the most common errors and how to avoid them:
- Using the wrong caulk: Always match the caulk to the application. For showers and tubs, use 100% silicone. For trim, use paintable acrylic latex.
- Applying caulk on damp surfaces: Moisture prevents proper adhesion. Always clean and dry the surface before caulking.
- Cutting the tip too large: A large opening creates a messy, oversized bead. Cut small and test on scrap material.
- Not smoothing the bead: Unsmoothed caulk is more likely to peel and trap dirt. Always smooth it out for a clean finish.
- Not allowing enough cure time: Rushing to expose the caulk to water or movement can ruin the seal. Follow the drying time on the packaging.
Pro Tip: If you're sealing around a bathtub or shower, fill the tub with water before caulking. The weight of the water slightly lowers the tub, creating a larger gap. When you drain the water, the caulk compresses and stays sealed even under movement.
When to Call a Professional
While caulking is generally a DIY-friendly task, there are situations where hiring a pro is the better choice. Consider professional help if:
- The area has extensive water damage or mold.
- You're working with specialized materials like natural stone or expensive tile.
- The project requires working on high exterior areas (second-story windows, roof flashing).
- You simply don't have the time or physical ability to do the job properly.
For larger renovations or if you're planning a home renovation, consulting with a professional can save you time and ensure long-lasting results. Always weigh the cost of professional labor against the potential cost of fixing a poor DIY job.
Final Tips for a Flawless Caulking Job
To wrap up, here are a few final tips to ensure your caulking project is a success:
- Work in warm conditions: Caulk flows better at room temperature. If it's cold, warm the tube in your hands or in warm water before use.
- Practice patience: Don't rush the process. Proper preparation takes time but is essential for durability.
- Clean up spills immediately: Silicone caulk is difficult to remove once cured. Keep a rag and solvent nearby for quick cleanup.
- Inspect regularly: Check caulked areas every 6–12 months and reapply as needed to maintain a watertight seal.
Armed with this comprehensive caulking guide, you're now ready to tackle any caulking project in your home. With the right tools and techniques, you can save money and achieve professional-grade results that protect and beautify your living space.