How to Add Electrical Outlets Safely
Complete DIY guide to adding new electrical outlets in your home. Step-by-step instructions, tool lists, wiring methods, and code requirements for a safe and professional installation.
Why Add More Outlets? Modern homes need more power. Whether you're upgrading a workshop, adding home office space, or simply tired of extension cords, installing additional outlets improves convenience, safety, and home value. This guide covers everything you need to know — from planning and tools to step-by-step installation and code compliance.
Tools & Materials You'll Need
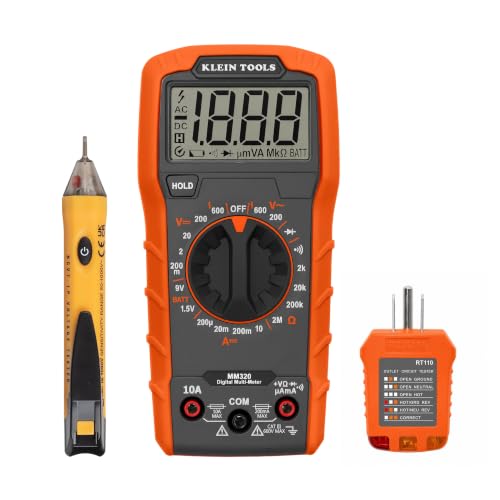
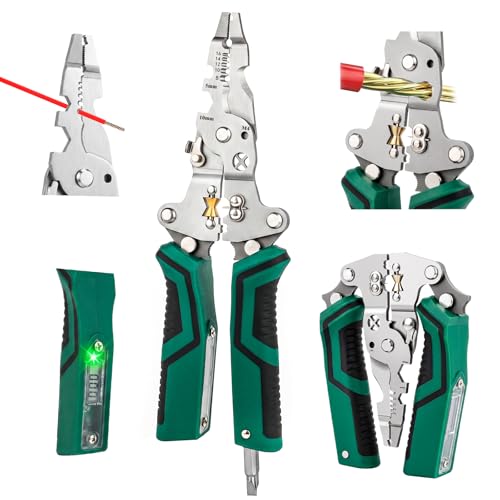
Before starting, gather these essential tools. Having everything ready makes the job smoother and safer.
For a complete tool selection, visit our Tools & Equipment section for detailed reviews and recommendations.
Step-by-Step Installation Guide
Follow these steps carefully. Always turn off power at the breaker panel before starting any electrical work.
1. Plan & Inspect
Determine where you need the new outlet. Check local electrical codes for spacing requirements (usually every 12 feet). Identify an existing circuit with capacity — a 15-amp circuit can handle up to 12 outlets. Use a voltage tester to confirm power is off before proceeding.
2. Run the Cable
Route 14/2 or 12/2 NM cable from the power source (existing outlet, junction box, or breaker panel) to the new location. Use wire basics to choose the correct gauge. Secure cable with staples every 4 feet and within 12 inches of each box.
3. Install the Box
Cut an opening for an electrical box using a drywall saw. Choose between old-work (remodel) boxes that clamp to drywall, or new-work boxes that attach to studs. Position the box so it's flush with the finished wall surface.
4. Wire the Outlet
Strip 3/4 inch of insulation from each wire. Connect black (hot) to the brass screw, white (neutral) to silver screw, and bare copper (ground) to the green screw. Pigtail connections if needed for multiple wires. Use wire strippers for clean, precise strips.
5. Secure & Test
Gently push wires into the box, mount the outlet with screws, and attach the cover plate. Restore power and test with a multimeter or outlet tester to verify correct wiring and proper grounding.
6. Final Safety Check
Ensure all connections are tight, no bare wire is exposed outside terminals, and the outlet is firmly mounted. For additional safety, consider GFCI protection if the outlet is near water sources like kitchens, bathrooms, or outdoors.
Which Installation Method is Right for You?
Choose the method that best fits your project, skill level, and home layout.
🔄 Adding to Existing Circuit
The most common method. Tap into a nearby outlet and run new cable to the new location. Works well when the existing circuit has adequate capacity.
⚡ New Circuit from Panel
Run a dedicated circuit from your main circuit breaker panel. Best for high-power areas like workshops or home offices with multiple devices.
🏠 Surface Mounting
Use surface-mounted conduit or wiremold when running cable inside walls is impractical. Ideal for garages, basements, or finished rooms where you prefer not to cut drywall.
🛡️ GFCI Protection
Install GFCI outlets in wet or damp locations as required by code. Learn more about outlets and switches and proper placement for safety.
📋 Electrical Code Requirements You Must Follow
- Outlet spacing: no point along a wall should be more than 6 feet from an outlet (NEC 210.52).
- GFCI protection required for bathrooms, kitchens, garages, crawl spaces, and outdoor areas.
- AFCI (Arc Fault Circuit Interrupter) protection is required for most residential living areas.
- Use tamper-resistant (TR) outlets in homes with children.
- All connections must be made in approved electrical boxes with proper cable clamps.
- Grounding is mandatory — never bypass the ground wire. For more safety guidance, review electrical safety tips.
Cost Breakdown for Adding an Outlet
Estimated costs for a typical DIY outlet installation. Professional labor adds $100–$200 per outlet.
If you need to upgrade your circuit breaker or add a new breaker, add $10–$30 for the breaker itself. Professional installation typically ranges from $150–$300 per outlet.
Common Troubleshooting Issues
❌ Outlet Not Working
Check the breaker (tripped?). Test the GFCI if present. Use a voltage tester to verify power at the outlet. Loose connections are the most common cause.
⚠️ Hot/Neutral Reversed
Use an outlet tester to detect reversed wiring. This means the black and white wires are swapped at the outlet terminals — a serious safety hazard.
🔌 No Ground Present
If you have a two-wire system without ground, you must install a GFCI outlet and label it "No Equipment Ground." Upgrading wiring is the best long-term solution.
🔋 Circuit Overloaded
If the breaker trips when you use the new outlet, the circuit may be overloaded. Consider adding a dedicated circuit for high-demand appliances.
Frequently Asked Questions
Can I add an outlet myself without a permit?
In many areas, a permit is not required for replacing existing outlets, but adding new ones often requires a permit. Always check your local building department. It's about safety, not just paperwork.
How many outlets can I add to a circuit?
For a 15-amp circuit, a maximum of 12 outlets is allowed by code (NEC 220.14). For a 20-amp circuit, up to 16 outlets. Consider the actual load — high-wattage devices reduce this number.
What's the difference between 14/2 and 12/2 wire?
14/2 wire is rated for 15-amp circuits, while 12/2 is rated for 20-amp circuits. Always match the wire gauge to the circuit breaker size. For more details, see our wiring basics guide.
Do I need GFCI protection for all new outlets?
No, only in wet or damp locations required by code (kitchens, bathrooms, outdoors, garages, basements). However, GFCI protection is always a good safety upgrade for any area.
💡 Final Pro Tip: Adding outlets is one of the most rewarding DIY electrical projects. It improves safety, eliminates extension cord hazards, and increases your home's functionality. Always prioritize safety — turn off power, test circuits before touching wires, and never overload circuits. When in doubt, consult a licensed electrician. For more home improvement projects, explore our home improvement section.