Air Sealing Guide: Stop Drafts & Save Energy
Discover how to identify and seal air leaks in your home. Improve comfort, reduce energy bills, and create a healthier indoor environment with our expert DIY guide.
Shop Recommended Tools →What is Air Sealing?
Air sealing is the process of finding and closing gaps, cracks, and openings in your home's building envelope. These leaks allow conditioned air to escape and unconditioned air to enter, forcing your HVAC system to work harder. By air sealing your home, you can reduce energy waste, eliminate drafts, and improve overall comfort.
Did you know? According to the U.S. Department of Energy, air sealing combined with proper insulation can reduce heating and cooling costs by up to 15% annually. Many homeowners recoup the cost of air sealing in less than two years through energy savings.
Why Air Sealing Matters
Air leaks are often invisible but can have a significant impact on your home's energy efficiency and comfort. Common culprits include gaps around windows and doors, electrical outlets, plumbing penetrations, attic hatches, and basement rim joists. Air sealing not only lowers energy bills but also:
- Improves Indoor Air Quality – Prevents dust, pollen, and outdoor pollutants from entering.
- Increases Comfort – Eliminates cold drafts in winter and hot spots in summer.
- Extends HVAC Lifespan – Reduces strain on heating and cooling systems.
- Prevents Moisture Damage – Reduces the risk of condensation and mold growth.
Whether you're planning a basement renovation or a kitchen makeover, addressing air leaks before you begin can save you money and improve the longevity of your remodel.
Common Air Leak Areas
Knowing where to look is the first step in effective air sealing. Here are the most common areas for air leaks in a home:
For a comprehensive approach, consider combining air sealing with attic remodeling or garage finishing to maximize energy efficiency across your entire home.
Air Sealing Tools & Materials
To properly air seal your home, you'll need the right tools and materials. Below is a list of essential items for DIY air sealing projects. Investing in high-quality products ensures a durable and effective seal.
Caulk & Caulking Gun
For sealing cracks up to ¼" wide. Use silicone or acrylic latex caulk for interior, and exterior-grade for outside.
Weatherstripping
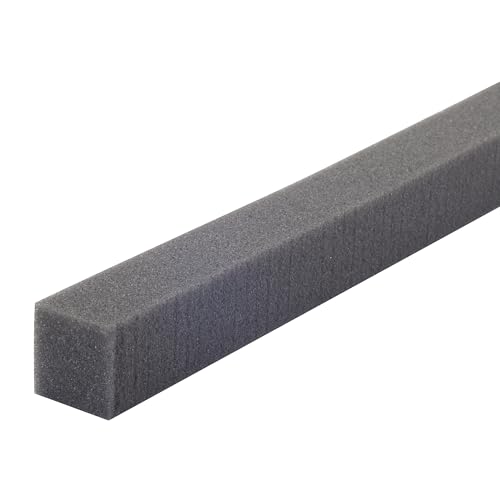
Self-adhesive foam tape, V-strip, or door sweeps for sealing gaps around doors and operable windows.
Expanding Foam Spray
For larger gaps around pipes, wires, and rim joists. Choose fire-rated foam for added safety.
Insulation
Batt or blown-in insulation to fill cavities after sealing, especially in attics and basements.
Draft Detector
An incense stick or thermal leak detector to identify hidden air leaks.
Safety Gear
Gloves, safety glasses, and a dust mask or respirator for protection during application.
These tools are essential for most DIY house projects focused on energy efficiency. For more advanced renovations, you may need professional-grade equipment.
How to Air Seal Your Home: A Step-by-Step Guide
Follow these steps to effectively air seal your home and start saving on energy costs:
- Conduct a Blower Door Test (Optional): For best results, hire a professional to perform a blower door test to pinpoint leaks. Alternatively, use a DIY draft detector.
- Seal Attic Hatch: Install weatherstripping around the attic hatch and insulate the back of the door.
- Caulk Gaps & Cracks: Use caulk to seal small gaps around window and door frames, baseboards, and where pipes enter the home.
- Apply Spray Foam: Fill larger gaps around plumbing, electrical wires, and rim joists with expanding foam. Ensure foam is fire-rated for areas near heat sources.
- Weatherstrip Doors & Windows: Apply weatherstripping to all movable components of windows and doors. Replace worn-out door sweeps.
- Seal Electrical Outlets: Install foam gaskets behind switch plates and outlet covers to reduce air infiltration.
- Check Fireplace & Chimney: Ensure the damper seals tightly when closed. Consider a chimney balloon if not in use.
- Add Insulation: After sealing, add or upgrade insulation in your attic, walls, and basement to maximize energy efficiency.
While this is a great DIY project, some areas like HVAC air duct sealing may require professional assistance to ensure safety and code compliance.
Cost & Potential Savings
The cost to air seal a typical home ranges from $200 to $1,500 for DIY materials, or $800 to $2,500 if hiring a professional. The final cost depends on the size of your home, the extent of leaks, and whether you need additional insulation.
Most homeowners recoup their investment through energy savings in 1 to 3 years. For a comprehensive home efficiency upgrade, consider combining air sealing with other improvements like attic finishing or house addition projects.
ROI Tip: Many utility companies offer rebates for air sealing and insulation upgrades. Check with your local provider to offset costs and maximize savings.
DIY vs. Professional Air Sealing
Deciding whether to tackle air sealing yourself or hire a pro depends on the scope of your project. If you're comfortable working in attics and crawlspaces, many air sealing tasks are accessible DIY projects. However, for large-scale projects or if you suspect hidden issues like mold or structural damage, hiring a professional is recommended.
Professional air sealing companies often use advanced equipment like thermal imaging cameras and blower doors to ensure a comprehensive seal. This is particularly valuable for complex homes or for those planning major renovations like kitchen and bathroom remodels where air sealing is a crucial step before finishing.
If you decide to go the DIY route, always follow safety guidelines, use proper ventilation, and wear appropriate protective gear.
Final Tips for Effective Air Sealing
- Focus on the Attic: The attic is a major source of air leaks. Prioritize sealing the attic floor before adding insulation.
- Use Quality Materials: Invest in durable caulk and weatherstripping to ensure long-lasting seals.
- Don't Forget the Basement: Seal rim joists and sill plates to prevent cold air from entering through the foundation.
- Test Your Work: After sealing, use a smoke pencil or incense stick to check for lingering drafts.
- Combine with Insulation: Air sealing is most effective when paired with proper insulation in attics, walls, and crawlspaces.
By following these tips, you can significantly improve your home's energy efficiency. For related upgrades, explore our guides on patio remodeling and deck remodeling to extend efficiency to your outdoor spaces.