Woodworking Basics: Your Complete Beginner's Guide
Master essential woodworking techniques, choose the right tools, and start building with confidence. Learn joinery, finishing, and safety fundamentals.
Woodworking is one of the most rewarding home improvement skills you can develop. Whether you're building a simple shelf, a birdhouse, or a piece of furniture, understanding woodworking basics is the foundation for every successful project. This guide covers everything a beginner needs to know: from selecting the right tools and materials to mastering essential techniques like joinery and finishing.
By the end of this article, you'll have a clear roadmap to start your first project with confidence. Let's dive into the fundamentals that will transform you from a novice into a capable woodworker.
1. Essential Woodworking Tools for Beginners
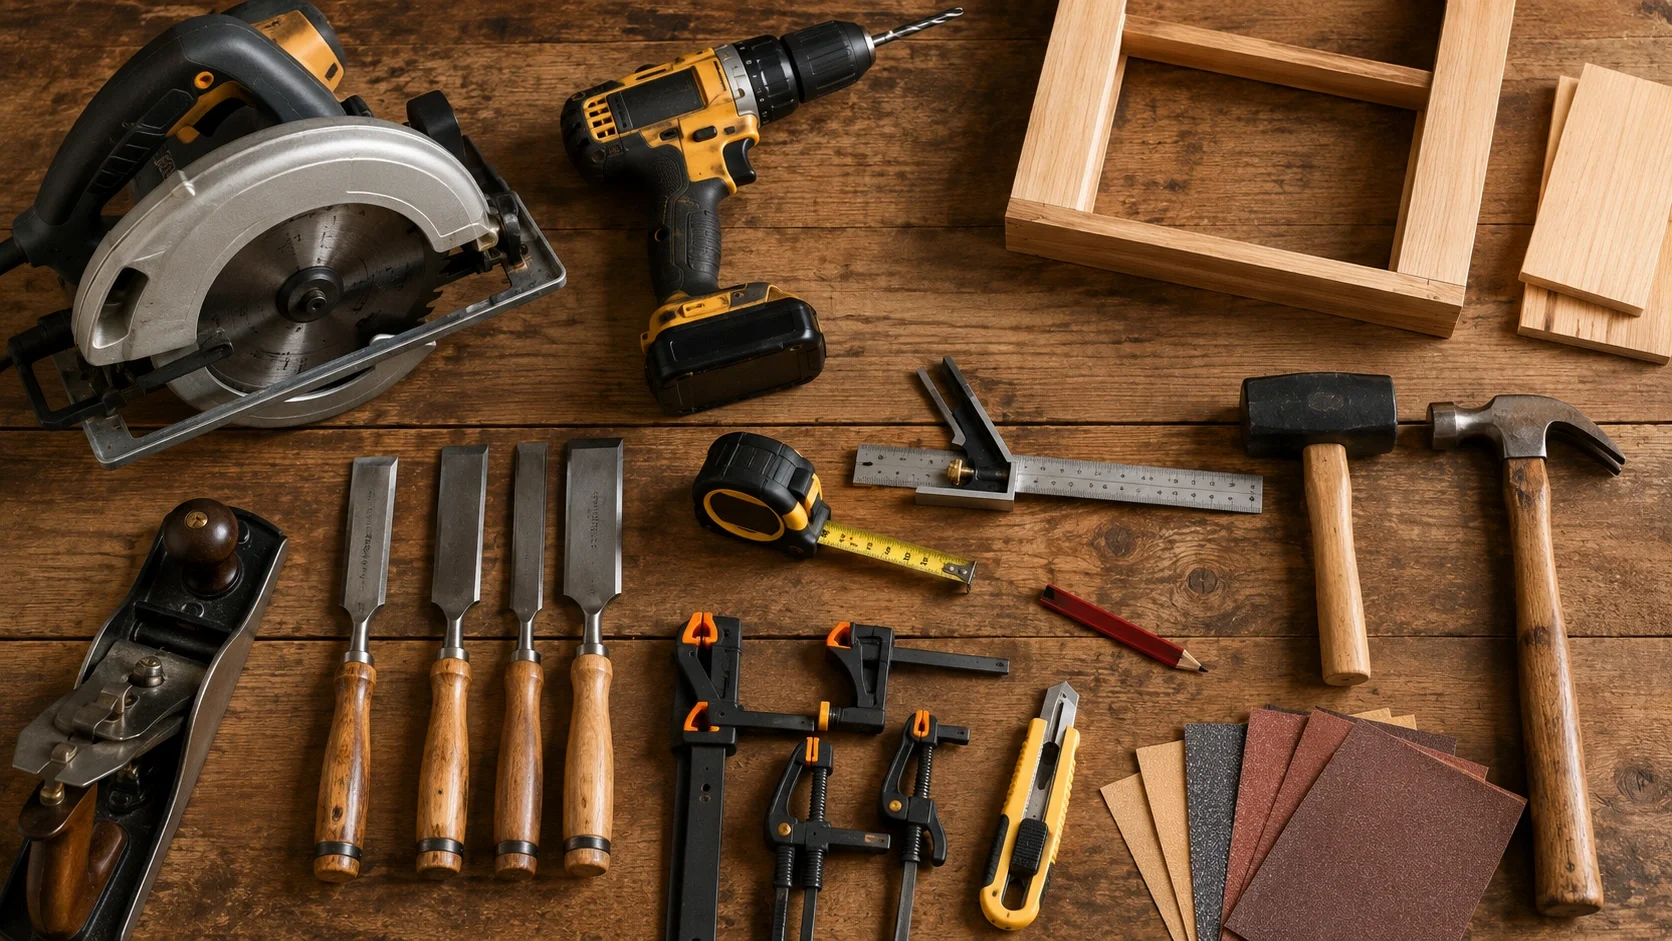
You don't need a fully equipped professional workshop to start woodworking. With a few quality tools, you can build most beginner projects. Here's what we recommend starting with:
🛠️ Measuring & Marking
- Tape measure – 16′ or 25′
- Laser level or combination square
- Pencil & marking knife
- Speed square
🔪 Cutting Tools
- Circular saw (or hand saw to start)
- Miter saw – for precise crosscuts
- Utility knife
- Chisel set (1/4″, 1/2″, 3/4″)
🔩 Joining & Assembly
- Cordless drill / driver
- Screwdriver set
- Clamps – at least 4 (various sizes)
- Wood glue
🪚 Shaping & Sanding
- Orbital sander
- Hammer (16 oz claw hammer)
- Pliers and wrenches
- Sandpaper (80, 120, 220 grit)
💡 Beginner Tip: Start with a cordless combo kit that includes a drill, impact driver, and circular saw. This gives you the core power tools at a better value. Add hand tools as you progress to more complex projects.
2. Understanding Wood Types & Selection
Choosing the right wood is critical for your project's success. Wood falls into two main categories: softwood (from coniferous trees) and hardwood (from deciduous trees). For beginners, softwoods like pine, cedar, and spruce are more affordable, easier to work with, and widely available.
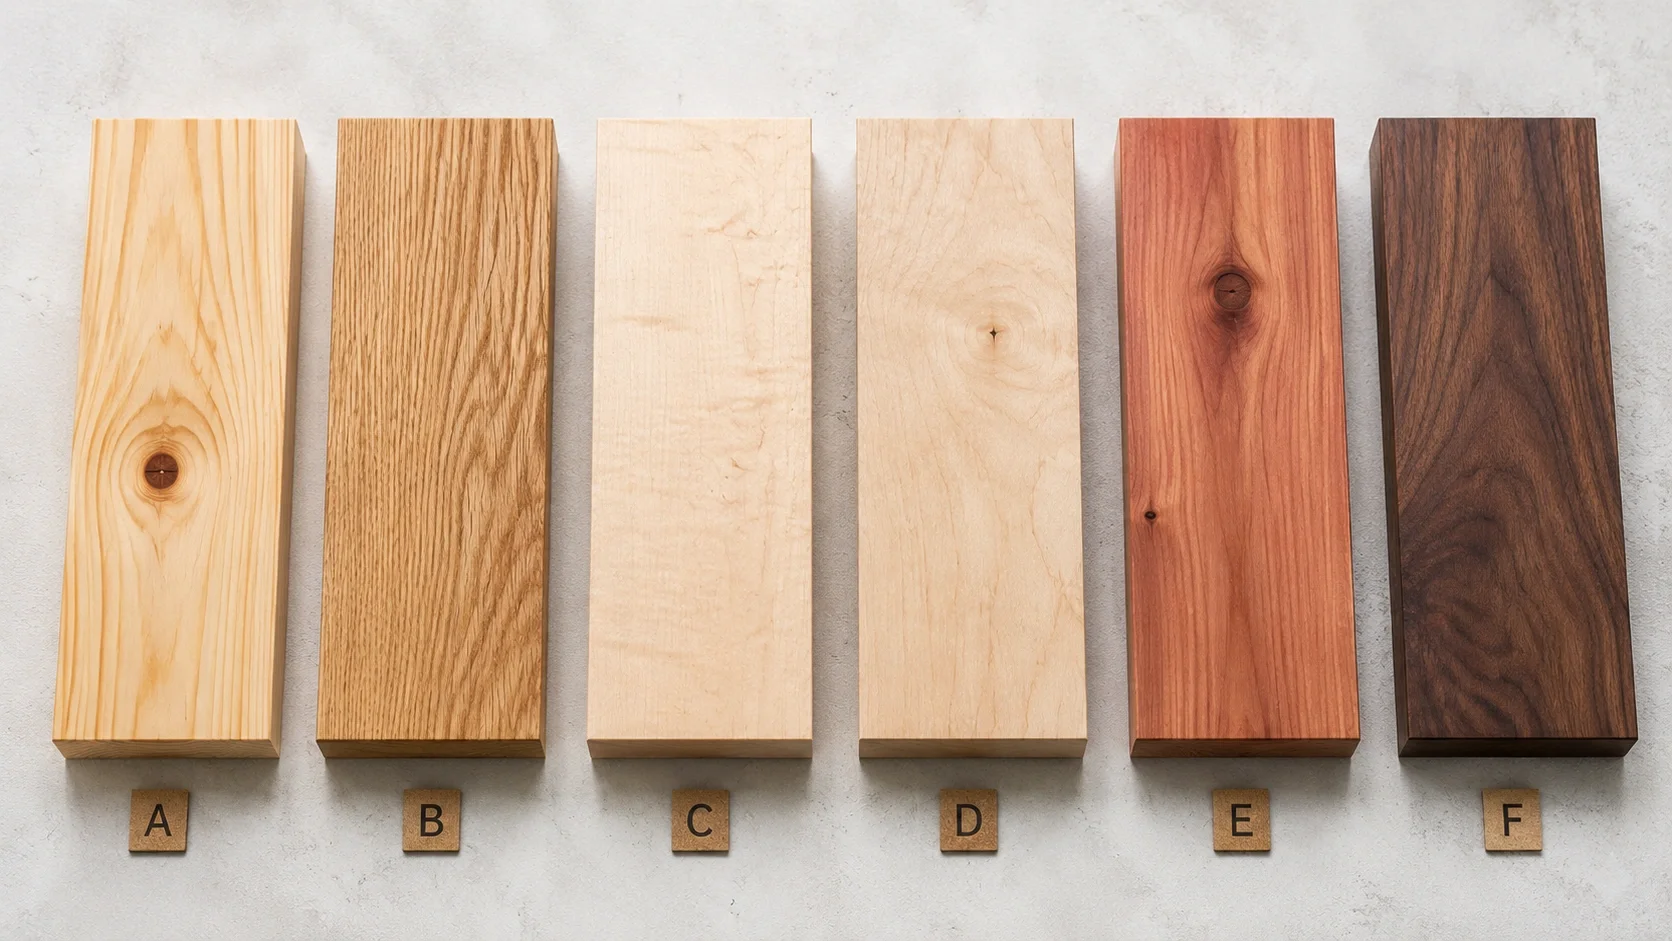
Here's a quick reference to help you choose:
| Wood Type | Hardness | Best For | Approx. Price (per board foot) |
|---|---|---|---|
| Pine | Soft | Shelves, frames, beginner projects | $2–$4 |
| Oak | Hard | Furniture, flooring, durable projects | $6–$10 |
| Maple | Hard | Cabinets, cutting boards, workbenches | $5–$8 |
| Birch | Medium | Plywood, shelving, general projects | $3–$6 |
| Cedar | Soft | Outdoor furniture, garden projects | $4–$7 |
For deeper guidance, check out our Wood Selection Guide and Lumber Buying Guide.
3. Joinery Basics: Connecting Wood
Joinery is the art of connecting two pieces of wood. Strong joints are the backbone of durable woodworking. Here are the most beginner-friendly joinery techniques:
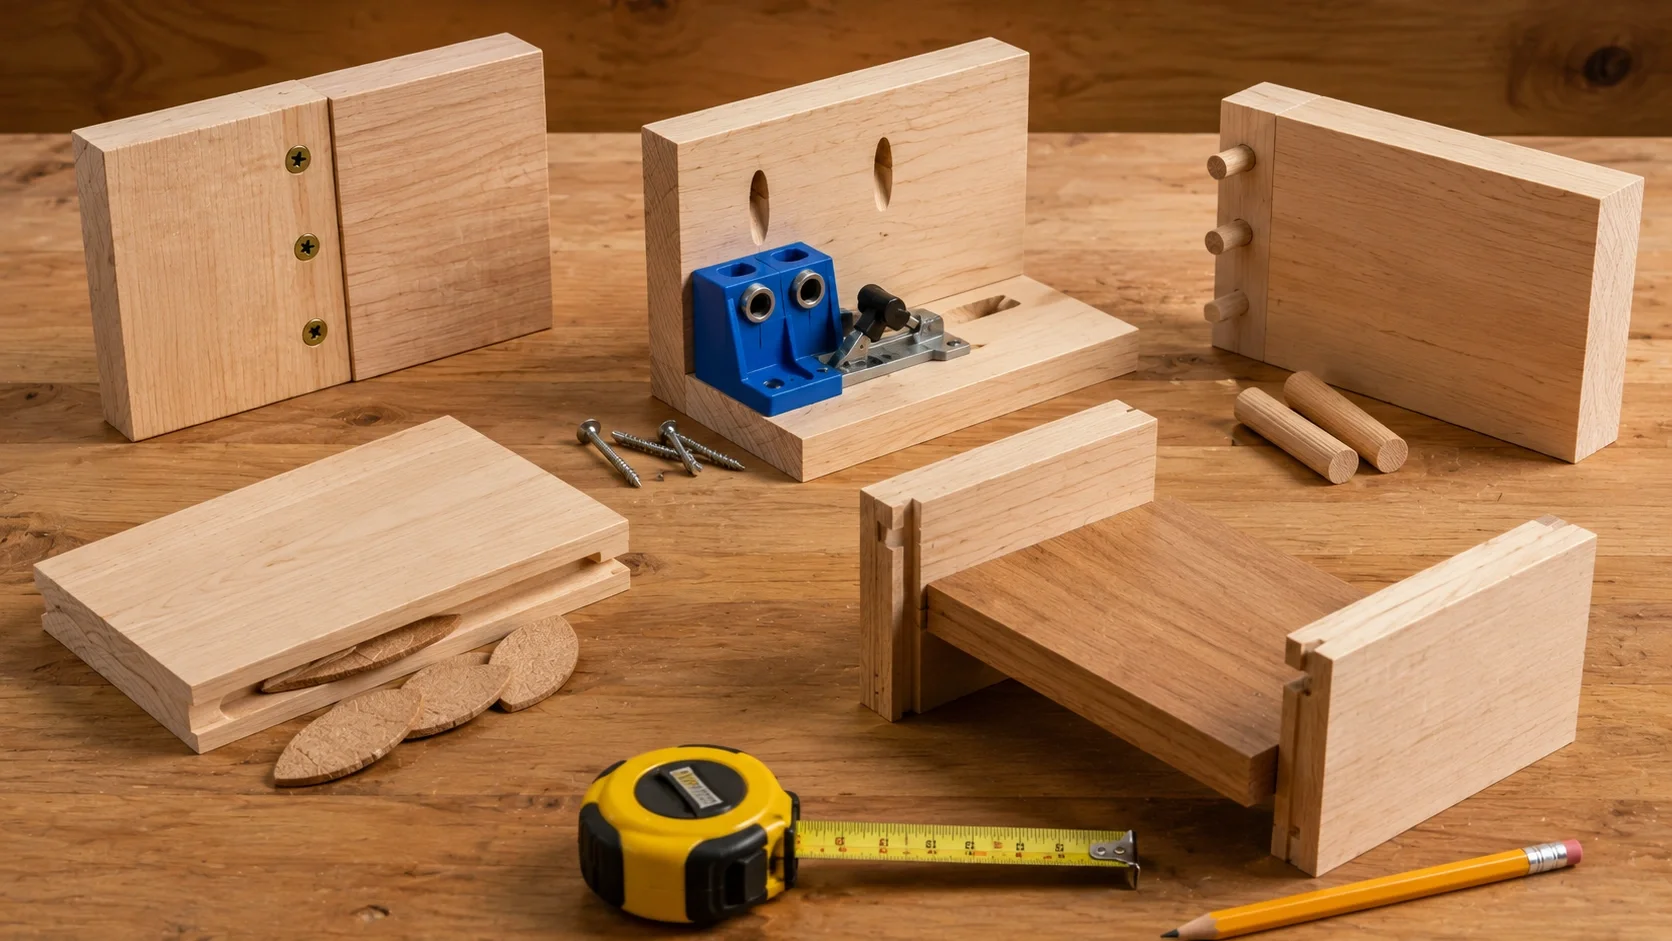
- Butt Joint: The simplest joint – two pieces of wood are simply butted together and fastened with glue and screws. Best for frames and basic construction.
- Pocket Hole Joint: Uses a special jig to drill angled holes. Strong, easy, and great for cabinets and furniture. Highly recommended for beginners.
- Dowel Joint: Wooden dowels are inserted into aligned holes. Provides good alignment and strength for furniture projects.
- Biscuit Joint: Uses oval-shaped wooden biscuits and glue. Excellent for joining panels and edge-gluing.
- Dado Joint: A groove cut across the wood grain. Perfect for shelves and cabinet carcasses.
For more detailed instruction, explore our Comprehensive Joinery Guide.
4. Wood Finishing Fundamentals
Finishing is what transforms a functional project into a beautiful piece. It protects the wood from moisture, scratches, and wear. Here are the finishing basics every beginner should know:
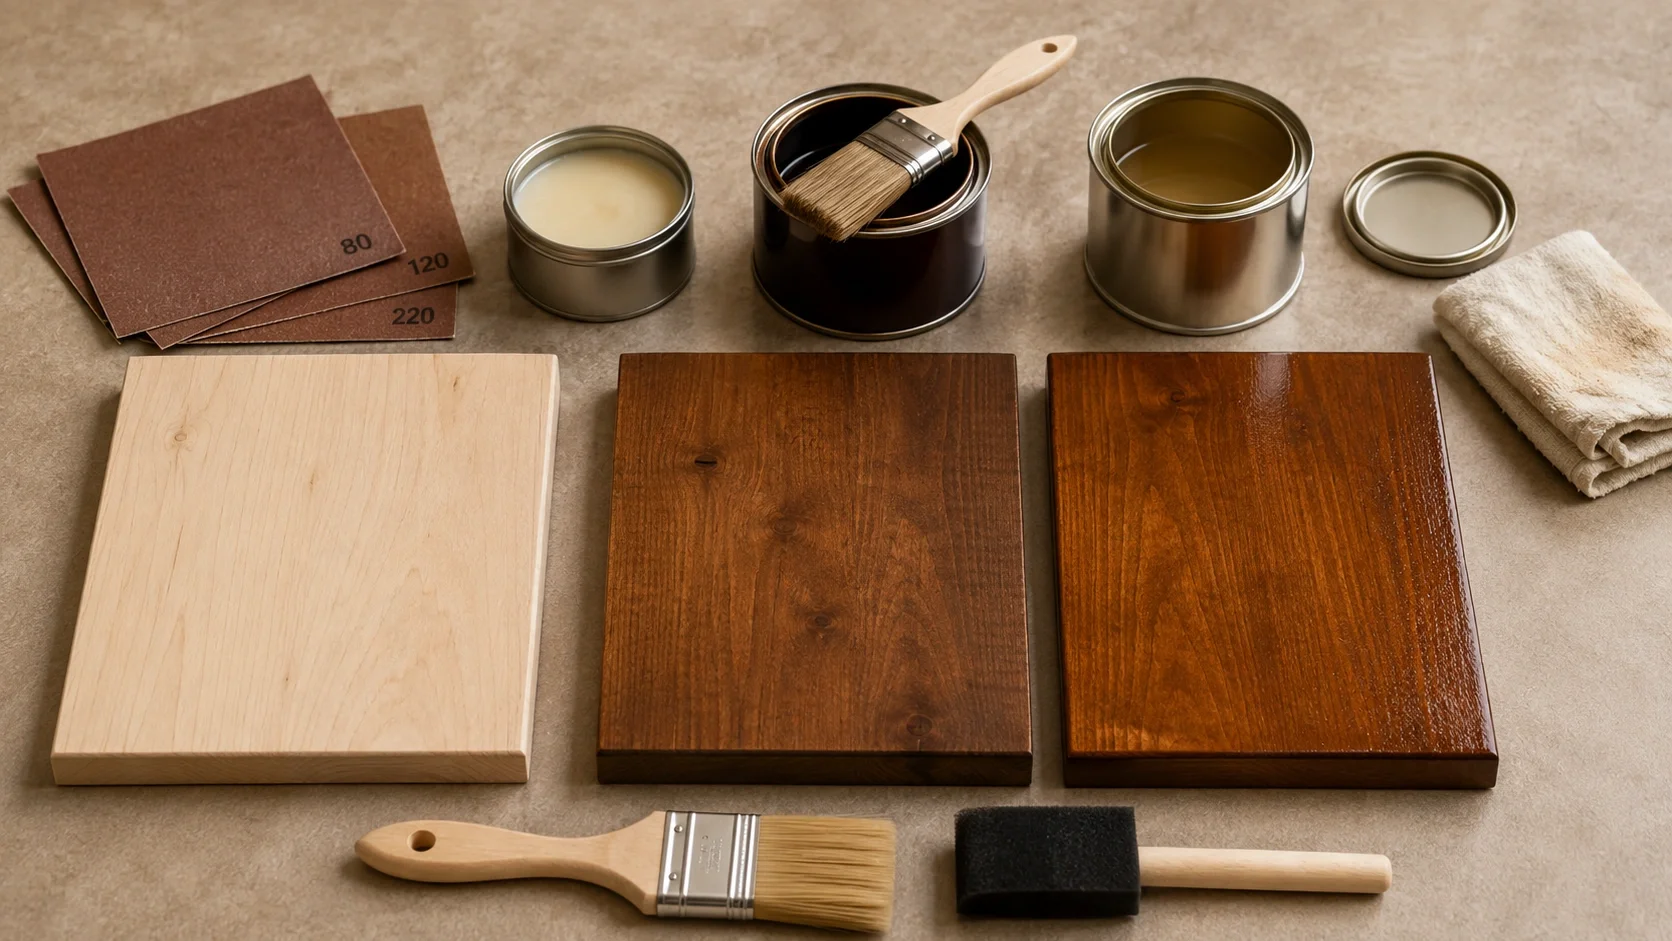
- Sanding: Start with 80-grit, then 120, and finish with 220-grit sandpaper. Always sand with the grain. This creates a smooth surface ready for finishing.
- Wood Conditioner: For softwoods like pine, applying a wood conditioner prevents blotchy stain absorption. Let it dry for 15–20 minutes before staining.
- Staining: Use a brush, rag, or foam applicator. Wipe off excess after 5–10 minutes. One coat is usually enough for beginners.
- Top Coat / Sealer: Apply polyurethane, shellac, or wax to protect your project. For beginners, water-based polyurethane is a great choice – it's low odor, easy to clean, and dries fast.
💡 Finishing Tip: Always test your stain and finish on a scrap piece of the same wood before applying to your project. This helps you see the final color and avoid surprises. Discover more in our Wood Finishing Guide.
5. Workshop Safety: Protecting Yourself
Safety is the most important woodworking skill to develop. Here are essential safety practices for your workshop:
- Always wear safety glasses – debris and dust can cause serious eye injuries.
- Use ear protection when using power tools like saws and sanders.
- Wear a respirator or dust mask to protect your lungs from sawdust and chemical fumes.
- Work gloves protect your hands from splinters and sharp edges – but never wear gloves near rotating tools like drills or saws.
- Use knee pads if you spend time kneeling during your projects.
- Keep your workshop clean and organized. A cluttered space increases risk of accidents. Explore tool organization ideas for a safer shop.
For a complete safety checklist, visit our Home Safety Guide.
6. Your First Project: Where to Start
Ready to build something? Here are excellent beginner-friendly woodworking projects that will help you practice your new skills:
- Simple Shelves – Learn measuring, cutting, and basic assembly.
- Birdhouse – Perfect for practicing joinery and finishing.
- Picture Frames – Develop miter saw and glue-up skills.
- Wooden Signs – Great for router and painting techniques.
- Planter Boxes – Learn weatherproof construction.
- Pallet Projects – Budget-friendly and creative.
For more inspiration, browse our Woodworking Projects Library.
7. Next Steps: Continue Your Woodworking Journey
Once you've completed your first project, you'll be ready to expand your skills. Here are recommended next topics:
- Learn advanced joinery with our Joinery Techniques guide.
- Explore Wood Carving for decorative details.
- Build bigger projects like Coffee Tables or Bookshelves.
- Set up your workshop with our Dust Collection and Workshop Lighting guides.
Remember, every expert was once a beginner. Take your time, enjoy the process, and celebrate each project you complete.