How to Adjust Water Pressure in Your Home
Learn to fine‑tune your home's water pressure – from diagnosing low pressure to safely increasing it, and knowing when to call a pro.
Jump to Step‑by‑Step Guide ↓Why water pressure matters: Too low and your shower feels weak, dishes don't get clean. Too high and you risk pipe damage, leaks, and wasted water. Adjusting water pressure is a simple DIY task that can save you money and improve daily comfort.
What is Normal Water Pressure?
Most homes should have water pressure between 40 and 60 PSI (pounds per square inch). Pressures above 80 PSI can damage appliances and pipes, while below 30 PSI often results in poor performance. You can check your pressure with a water pressure gauge – a simple, inexpensive tool that screws onto any hose bib or faucet.
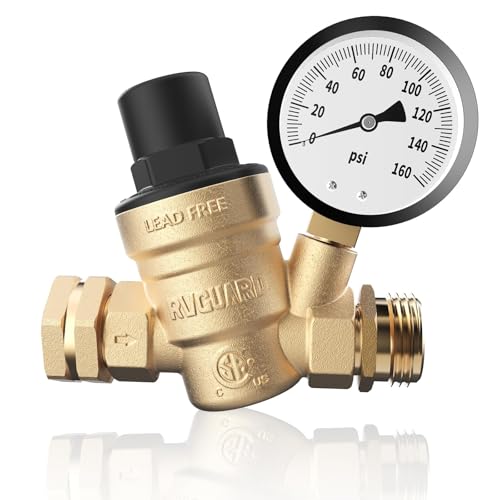
If you're on a well, pressure is controlled by the pressure switch and tank. For municipal water, a pressure reducing valve (PRV) is usually installed where the main water line enters your home. Both systems can be adjusted with basic tools.
Why is My Water Pressure Too Low or Too High?
- Low pressure: Clogged aerators, partially closed shutoff valves, pipe corrosion, or a failing well pump.
- High pressure: Malfunctioning PRV, thermal expansion (water heater), or high municipal supply pressure.
- Fluctuating pressure: Air in pipes, water hammer, or a failing pressure tank (well systems).
Before adjusting, always check the main shutoff valve is fully open. A partially closed valve is one of the most common – and easiest to fix – causes of low pressure.
Tools & Equipment for Adjusting Water Pressure
Pressure Gauge
$12–$25
Adjustable Wrench
$10–$30
Pliers (Channel‑lock)
$15–$40
Teflon Tape
$3–$6
If you don't have a pressure gauge, it's a worthwhile investment. You can find affordable options at any hardware store or online.
How to Adjust Water Pressure – Step by Step
⚠️ Safety first: Always wear safety glasses and work gloves. If you're unsure about any step, consult a licensed plumber. For homes with a well, adjustments to the pressure switch should be done carefully – read your well pump manual.
For Municipal Water (with PRV)
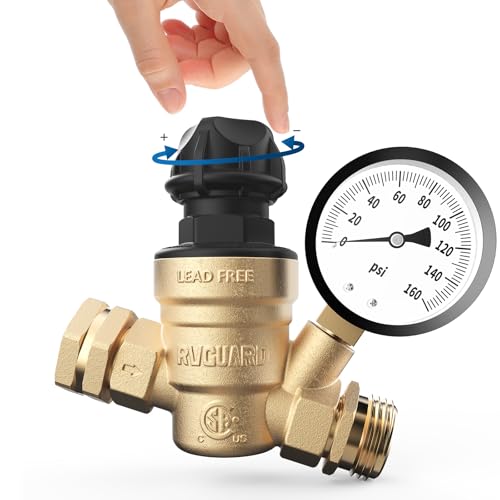
- Locate the Pressure Reducing Valve (PRV). Usually near the main water shutoff valve, often a bell‑shaped brass device with a screw on top.
- Attach a pressure gauge to an outside hose bib or laundry sink faucet. Turn on the water to get a reading.
- Adjust the PRV: Loosen the locknut on top of the PRV. Turn the adjustment screw clockwise to increase pressure, counter‑clockwise to decrease. Make small adjustments (quarter‑turn at a time).
- Check pressure again after each adjustment. Aim for 50–60 PSI for optimal performance.
- Tighten the locknut when you're satisfied. Test all faucets for any changes.
For Well Water Systems
- Turn off power to the well pump at the breaker.
- Locate the pressure switch – typically a grey or black box near the pressure tank. Remove the cover.
- Adjust the cut‑in and cut‑out settings: The switch has two springs. The larger spring adjusts the cut‑in (pump starts) and cut‑out (pump stops). Usually set at 40/60 PSI. Turn the nut clockwise to raise both, counter‑clockwise to lower.
- Reinstall the cover, turn power back on, and monitor the gauge. Let the tank fill and check the pressure.
- Fine‑tune if needed. If you're not comfortable, consider calling a pro.
💡 Pro tip: After adjusting, run the hot water for a few minutes to let the system stabilize, then re‑check pressure. Also, clean faucet aerators and showerheads – they can collect debris and reduce flow even when pressure is correct.
When to Call a Professional
While adjusting water pressure is generally a DIY task, certain situations require a licensed plumber:
- You have no pressure reducing valve (PRV) and need one installed.
- Your pressure is consistently above 80 PSI – this may indicate a faulty PRV or thermal expansion issue.
- You notice water hammer (banging pipes) after adjustments.
- Your well system's pressure switch is old or damaged.
- You're planning major renovations that affect the main water line.
For professional help, you can search for licensed home improvement contractors near me or remodeling contractors with financing options.
Cost to Adjust or Replace Pressure Components
| Service / Part | Average Cost |
|---|---|
| Pressure gauge (DIY) | $15 |
| Pressure reducing valve (PRV) replacement | $250–$450 |
| Well pressure switch replacement | $100–$250 |
| Plumber visit (diagnostic + adjustment) | $150–$300 |
| Whole‑home pressure booster pump | $500–$1,200 |
If you're planning a home renovation, it's a good time to have your plumbing system inspected and upgraded.
Maintaining Optimal Water Pressure
- Test pressure annually – seasonal changes can affect municipal supply.
- Install a pressure gauge permanently after the PRV for easy monitoring.
- Flush your water heater annually to prevent sediment build‑up that can reduce flow.
- Check for leaks – even a small drip can drop pressure over time.
- If you're on a well, learn how to increase water pressure when on a well for more in‑depth well‑specific advice.
For broader home improvement context, explore what renovations add the most value to a home – good water pressure is a key factor in a comfortable, valuable home.
Final Thoughts
Adjusting your home's water pressure is a straightforward DIY project that can dramatically improve your daily life – from invigorating showers to efficient dishwashing. With a simple pressure gauge and a few basic tools, you can diagnose and fix most pressure issues in under an hour.
Remember: if you're ever in doubt, don't hesitate to call a professional. The peace of mind is worth the cost. And if you're planning a larger remodel, check bathroom remodel costs or kitchen renovation costs to budget accordingly.