How to Adjust Water Pressure in Your House
Learn the exact steps to test, adjust, and fix your home's water pressure. Whether it's too low or too high, this guide shows you how to get it right – safely and effectively.
JUMP TO STEP-BY-STEP GUIDEWhy water pressure matters: Proper water pressure protects your pipes, extends appliance life, and ensures satisfying showers and faucet flow. This guide walks you through everything from diagnosing pressure issues to making the final adjustment.
What You'll Learn
What Is Water Pressure & Why Does It Matter?
Water pressure is the force that pushes water through your pipes and out of your fixtures. It's measured in pounds per square inch (PSI). Most homes should have pressure between 40–60 PSI. Too low, and showers become weak; too high, and you risk burst pipes, leaking joints, and premature appliance failure.
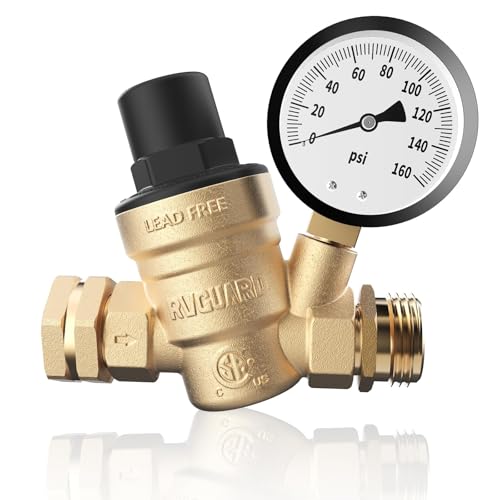
Adjusting your water pressure is a straightforward DIY task if you know where your pressure reducing valve (PRV) is located. This valve is typically installed where the main water line enters your house. If you're unsure, check near your water meter or where the main line comes through the foundation. For more complex plumbing issues, you might need to consult a bathroom contractor or plumbing professional, but pressure adjustment is usually a simple homeowner fix.
Tools You'll Need
Before you start, gather these basic tools. Most are already in a typical homeowner's toolbox.
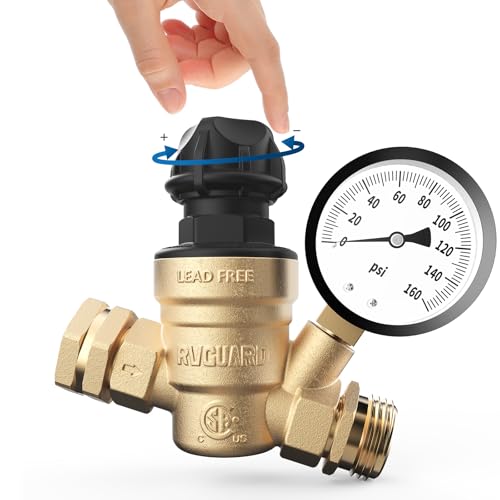
If you don't have a pressure gauge, they're inexpensive (around $10–$15) and available at any hardware store. You'll also need to locate your pressure reducing valve (PRV) – it looks like a brass bell with a screw on top.
Step-by-Step Guide to Adjust Water Pressure
Follow these steps carefully. If you're not comfortable working with your home's main water supply, consider hiring a professional. However, for most homeowners, this is a safe and rewarding DIY project.
- Step 1: Test your current pressure. Attach the pressure gauge to an outdoor spigot or washing machine hose bib. Turn on the water fully and note the PSI reading. Do this at a time when water usage is low (early morning or late evening).
- Step 2: Locate the pressure reducing valve (PRV). Follow the main water line from the meter into your home. The PRV is typically a brass bell-shaped device with a threaded bolt on top. If you can't find it, check near the water heater or where the main line enters the basement or crawlspace.
- Step 3: Turn off the water supply. It's wise to shut off the main valve before adjusting the PRV to avoid any sudden pressure surges. Open a faucet to release residual pressure.
- Step 4: Adjust the PRV. Using your wrench or screwdriver, turn the adjustment screw clockwise to increase pressure, or counterclockwise to decrease it. Make small turns – about ¼ rotation at a time – and re-test pressure after each adjustment.
- Step 5: Re-test and fine-tune. Turn the water back on and re-check the pressure gauge. Aim for 50–60 PSI for most homes. Make additional ⅛ turns until you reach your target.
- Step 6: Check all fixtures. After adjusting, run showers, faucets, and appliances to ensure the pressure feels right and there are no water hammer noises or leaks.
Recommended Water Pressure Ranges
Here's a quick reference table to help you understand what's ideal for different parts of your home.
| Application | Recommended PSI | Notes |
|---|---|---|
| General household (most homes) | 40–60 PSI | Balanced for comfort and safety |
| Optimal for appliances (dishwashers, washing machines) | 50–60 PSI | Manufacturer recommended |
| Showers & faucets | 45–55 PSI | Good flow without splashing |
| Irrigation systems | 30–50 PSI | Lower to prevent misting |
| Maximum safe limit | 80 PSI | Do not exceed |
Common Water Pressure Problems & How to Fix Them
Even after adjusting your PRV, you might still experience pressure fluctuations. Here are some common issues and their solutions:
- 🔹 Low pressure at one fixture: Clean the aerator or showerhead. Mineral buildup is often the culprit.
- 🔹 Fluctuating pressure everywhere: Could be a failing PRV. If adjusting doesn't help, it may need replacement (typically $150–$300 for parts and labor).
- 🔹 Water hammer (banging pipes): This is often caused by high pressure or loose pipes. Try installing a water hammer arrestor or reducing pressure slightly.
- 🔹 No pressure at all: Check if the main valve is fully open. If it is, there may be a leak or blockage – call a plumbing handyman immediately.
If you're planning a larger home renovation, consider integrating plumbing updates. For example, during a bathroom remodeling or kitchen remodeling project, it's the perfect time to upgrade your PRV or install a new one.
Frequently Asked Questions About Water Pressure
Can I adjust water pressure myself?
Yes, in most cases you can adjust water pressure yourself using the PRV. Follow the step-by-step guide above. However, if you're unsure, it's always safer to call a professional.
What is the ideal water pressure for a house?
Most experts recommend 40–60 PSI. For homes with older pipes, 50 PSI is often the sweet spot to balance flow and safety.
How do I know if my pressure is too high?
Signs of high pressure include banging pipes (water hammer), frequent leaks, and appliances wearing out prematurely. A pressure gauge will give you the definitive answer.
Why is my water pressure low all of a sudden?
Sudden low pressure can be caused by a broken main, a clogged aerator, or a failing PRV. Start by checking your pressure gauge and inspecting the PRV.
Still have questions? Our contact page is always open, or you can explore our plumbing guides for more detailed tutorials.
Ready to adjust your water pressure?
Get the right tools for the job. Below are our top-rated pressure gauges and water pressure regulators.
SHOP RECOMMENDED TOOLS