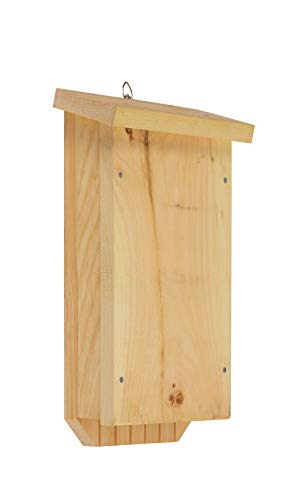
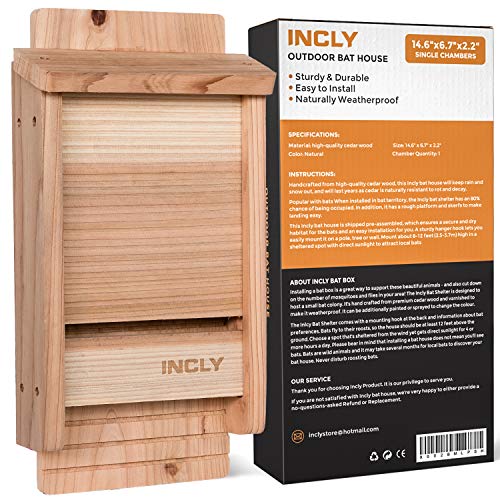
DIY Bat House Plans: Build a Safe Habitat for Bats
Attract beneficial bats to your garden with a handmade bat house. This complete guide covers everything from design to installation, helping you support local bat populations while enjoying natural pest control.
VIEW PLANS & INSTRUCTIONSWhy Build a Bat House? A single bat can eat thousands of insects each night, including mosquitoes and garden pests. By building and installing a bat house, you create a safe roosting site that supports bat conservation and reduces the need for chemical pesticides in your yard.
Bat House Basics: What You Need to Know
Before you start cutting wood, it's important to understand what makes a bat house effective. Bats are particular about their roosting spaces. The right design, materials, and placement are critical to attracting bats. This guide covers the essential dimensions, materials, and installation tips to ensure your bat house becomes a welcome home for these important creatures.
Building a bat house is a rewarding woodworking project that supports local ecosystems. It's also a great way to introduce children to conservation and wildlife. With the right woodworking skills and a few basic tools, you can create a functional and durable structure that will last for years.
Complete Bat House Plans & Materials
Our free bat house plans are designed to meet the recommended specifications from Bat Conservation International. The design features a chamber that provides the ideal roosting environment with proper temperature regulation and protection from predators.
Materials You'll Need
- Wood: 1″ x 10″ x 8′ rough-cut cedar or exterior-grade plywood (untreated)
- Exterior Paint: Dark color for heat absorption (depends on climate)
- Screws: 1.5″ exterior wood screws
- Wood Glue: Exterior waterproof adhesive
- Caulk: Exterior-grade silicone caulk
- Hardware Cloth: For landing pad (optional)
Estimated Cost: $50–$80 for materials.
Step-by-Step Building Instructions
Follow these steps to build a standard single-chamber bat house. If you're new to woodworking projects, this is a great beginner-friendly build.
Cut the Wood Panels
Cut the backboard (1″ x 10″ x 30″), front panel (1″ x 10″ x 22″), and side panels (1″ x 10″ x 30″). The design should create a ¾″ roosting chamber.
Create the Roosting Space
Attach the side panels to the backboard, leaving a gap at the bottom for ventilation. Add vertical grooves to the backboard to help bats climb.
Assemble the Box
Secure the front panel to create the chamber. Use wood glue and screws for a weatherproof seal. Caulk all exterior seams to prevent drafts.
Paint & Finish
Apply 2–3 coats of dark exterior paint (black or dark brown) to help absorb heat. In hot climates, use a lighter color to prevent overheating.
Install the Landing Pad
Attach a piece of hardware cloth or rough wood below the entrance to provide a gripping surface for bats entering and exiting.
Mount Your Bat House
Mount the bat house on a pole or building, at least 12–20 feet high, facing south or southeast. Ensure it receives 6–8 hours of sunlight daily.
🌿 Pro Tip: Location & Placement
Bats prefer warm roosts. Mount your bat house on a pole or building at least 12 feet above the ground. Avoid placing it near bright lights or busy areas. If you have a home improvement project that involves outdoor work, consider integrating a bat house into your backyard or garden plan. Providing a water source nearby, like a pond or birdbath, will also make your property more attractive to bats.
Why Build a Bat House? Benefits for Your Home & Garden
Bat houses offer a simple, effective way to support bat populations while enjoying the benefits of natural pest control. Here are some key advantages:
- ✅ Natural Pest Control: A single bat can eat up to 1,000 mosquitoes per hour.
- ✅ Eco-Friendly: Reduce the need for chemical pesticides in your garden.
- ✅ Conservation: Provide safe roosting sites for threatened bat species.
- ✅ Educational: A great project to teach kids about wildlife and ecology.
For more outdoor and garden projects, explore our guides on outdoor & garden improvements. Building a bat house is a wonderful addition to any deck remodeling or patio remodeling project, adding ecological value to your outdoor living space.
Frequently Asked Questions About Bat Houses
How long does it take for bats to move in?
It can take from a few weeks to over a year for bats to discover and occupy a new bat house. Patience is key! Proper placement and design significantly increase the chances of occupancy.
What color should I paint the bat house?
In cooler climates, use dark colors (black, dark brown) to absorb heat. In warmer regions, lighter colors (tan, light gray) help prevent overheating. Research your local climate.
Do I need to clean the bat house?
Cleaning is generally not recommended, as it can disturb roosting bats. If necessary, clean it in the fall or winter when bats are not present, and wear protective gear.
If you're considering other home improvement projects, building a bat house is a small but impactful way to enhance your property's ecological value. Check our DIY tips section for more beginner-friendly projects and tools & equipment recommendations to help you get started with confidence.